
Supplementary guide for trailing arm bushings:
https://www.rtsauto.com/the-easy-way-to-remove-and-install-e30-trailing-arm-bushings/
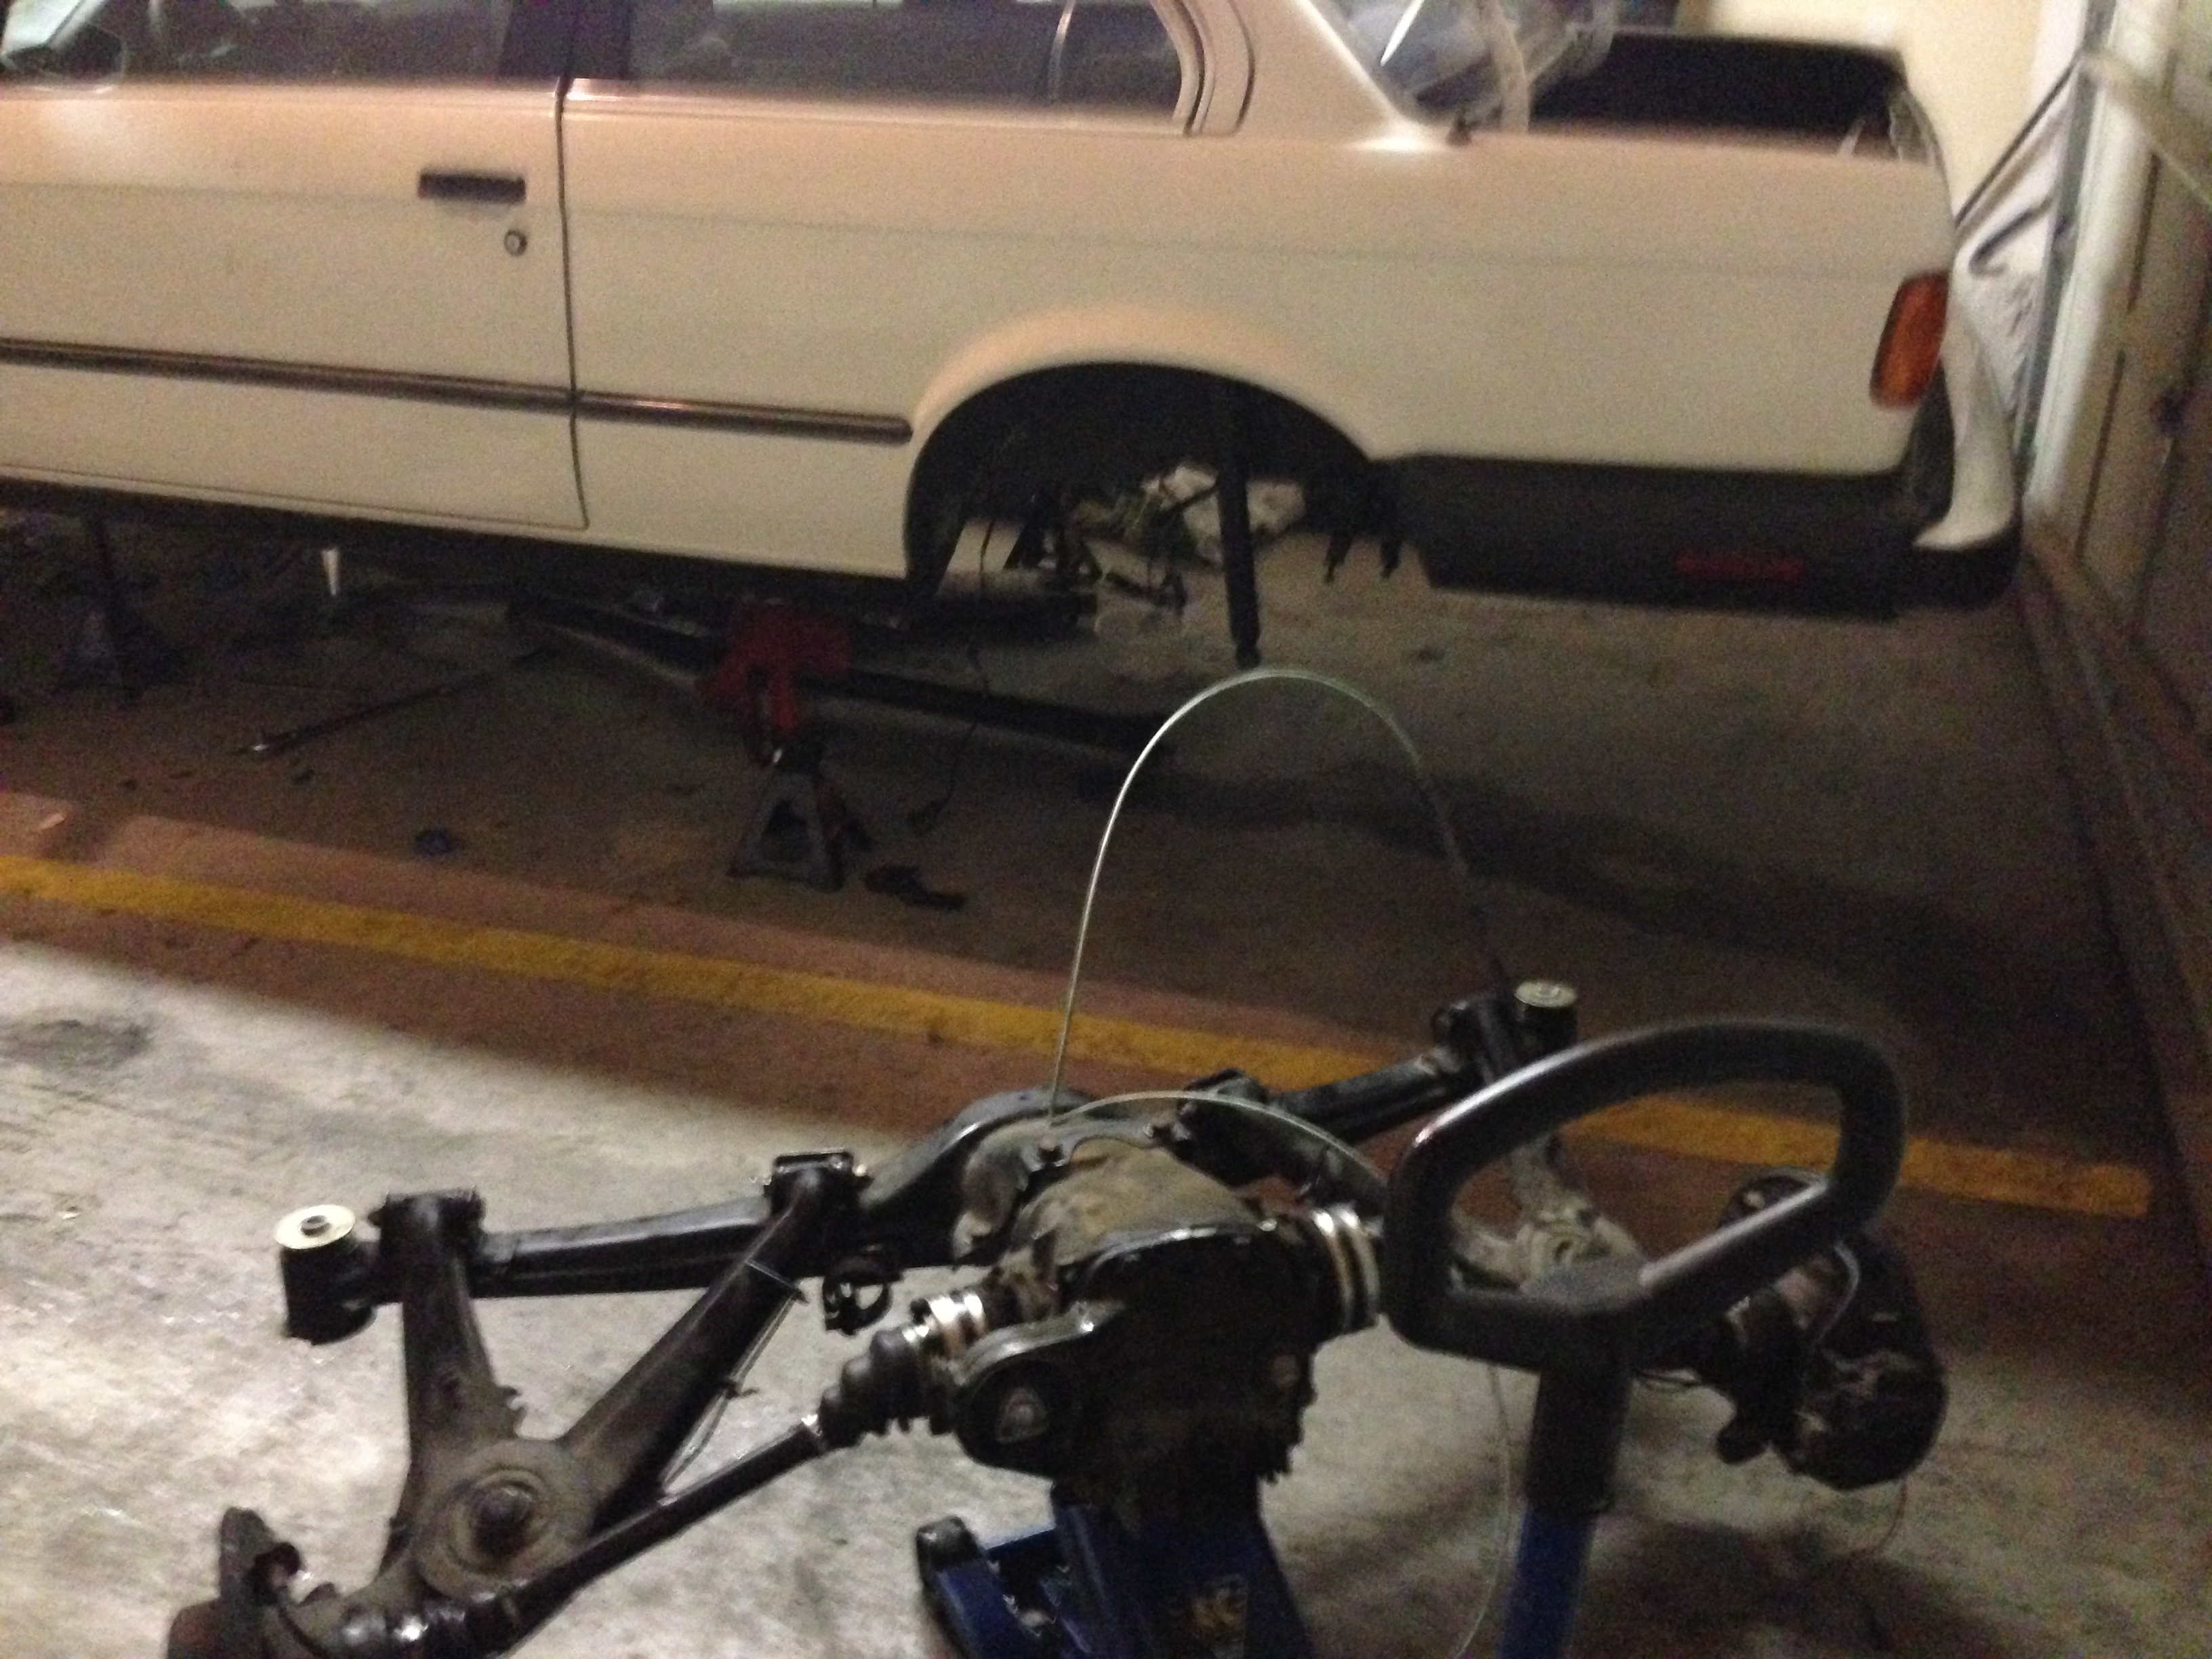
This is a step by step DIY on how to remove the whole E30 rear subframe assembly, and how to remove and install stock and aftermarket subframe bushings:
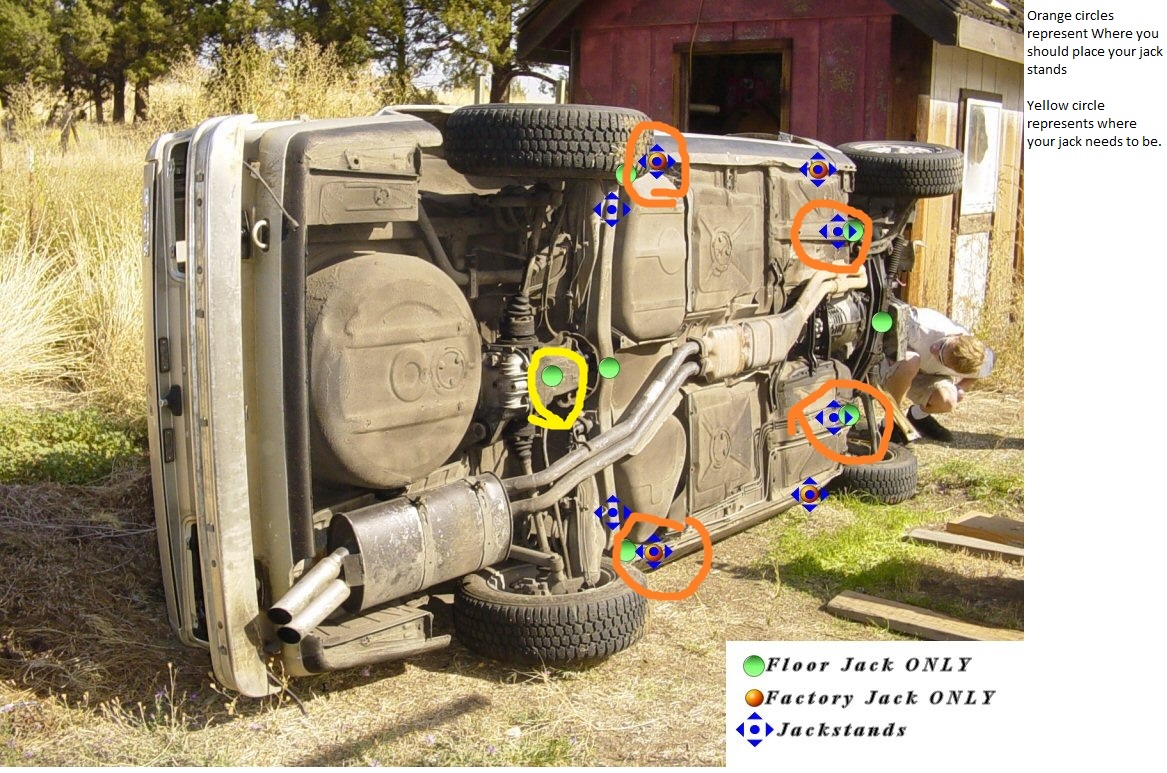
1. Put car on 4 jack stands, in the back since you will be removing the subframe, the rear jack stands will hold the body, so you need to pick a jack stand position that does not involve the rear subframe, see the orange circles for my recommended jack stand locations.
Put your jack under the differential, pump it up so it barely touches the differential; location represented by yellow circle
2.Undo the the 2 muffler hangers
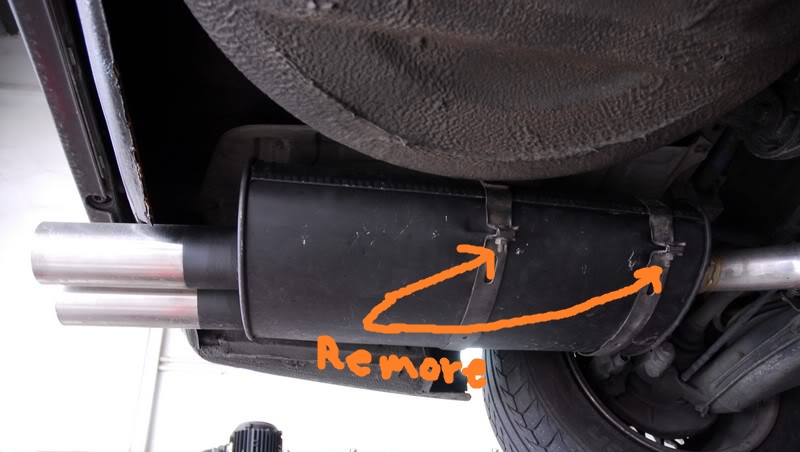
Undo 4 nuts connecting muffler to mid section/catalytic converter, after they have been removed you can proceed to pull the muffler off.
3.Undo drive shaft nuts (17mm) that connect the drive shaft to the differential, to keep the drive shaft from rotating, engage the emergency brake and put the car into gear. After you have undone 1-2 nuts, disengage the emergency brake+gear and turn the brake rotors by hand until you have access to the other 1-2 bolts. Repeat the process until you have undone all the nuts.
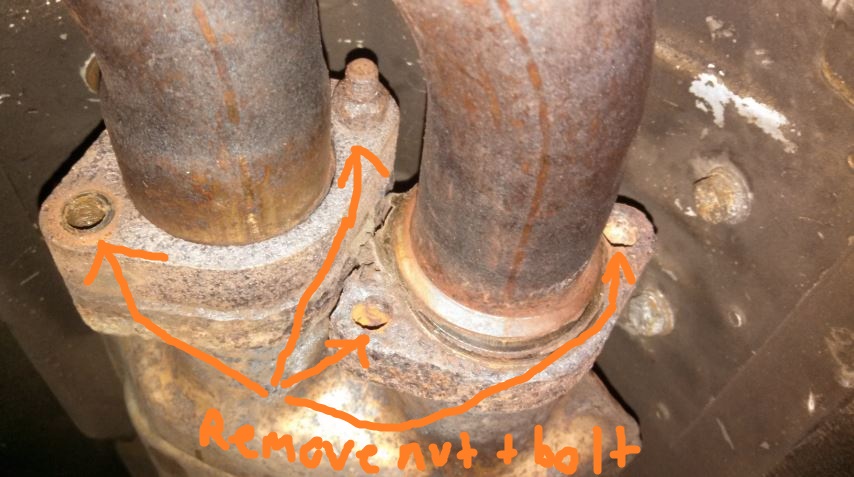
If you can’t remove the drive shaft from the subframe tunnel, then remove the midsection of the exhaust from the headers (6 nuts) near the front of the car, I found it easiest to work from the bottom with very long extensions and a u-joint socket to remove these 6 nuts. Then remove the heat shielding that was above the mid pipe, and there you will find the rest of the drive shaft, you will find the center drive shaft bearing there, held on by 2 bolts, undo those bolts, and it will allow you to drop the middle of the drive shaft which should allow you to clear the subframe tunnel.
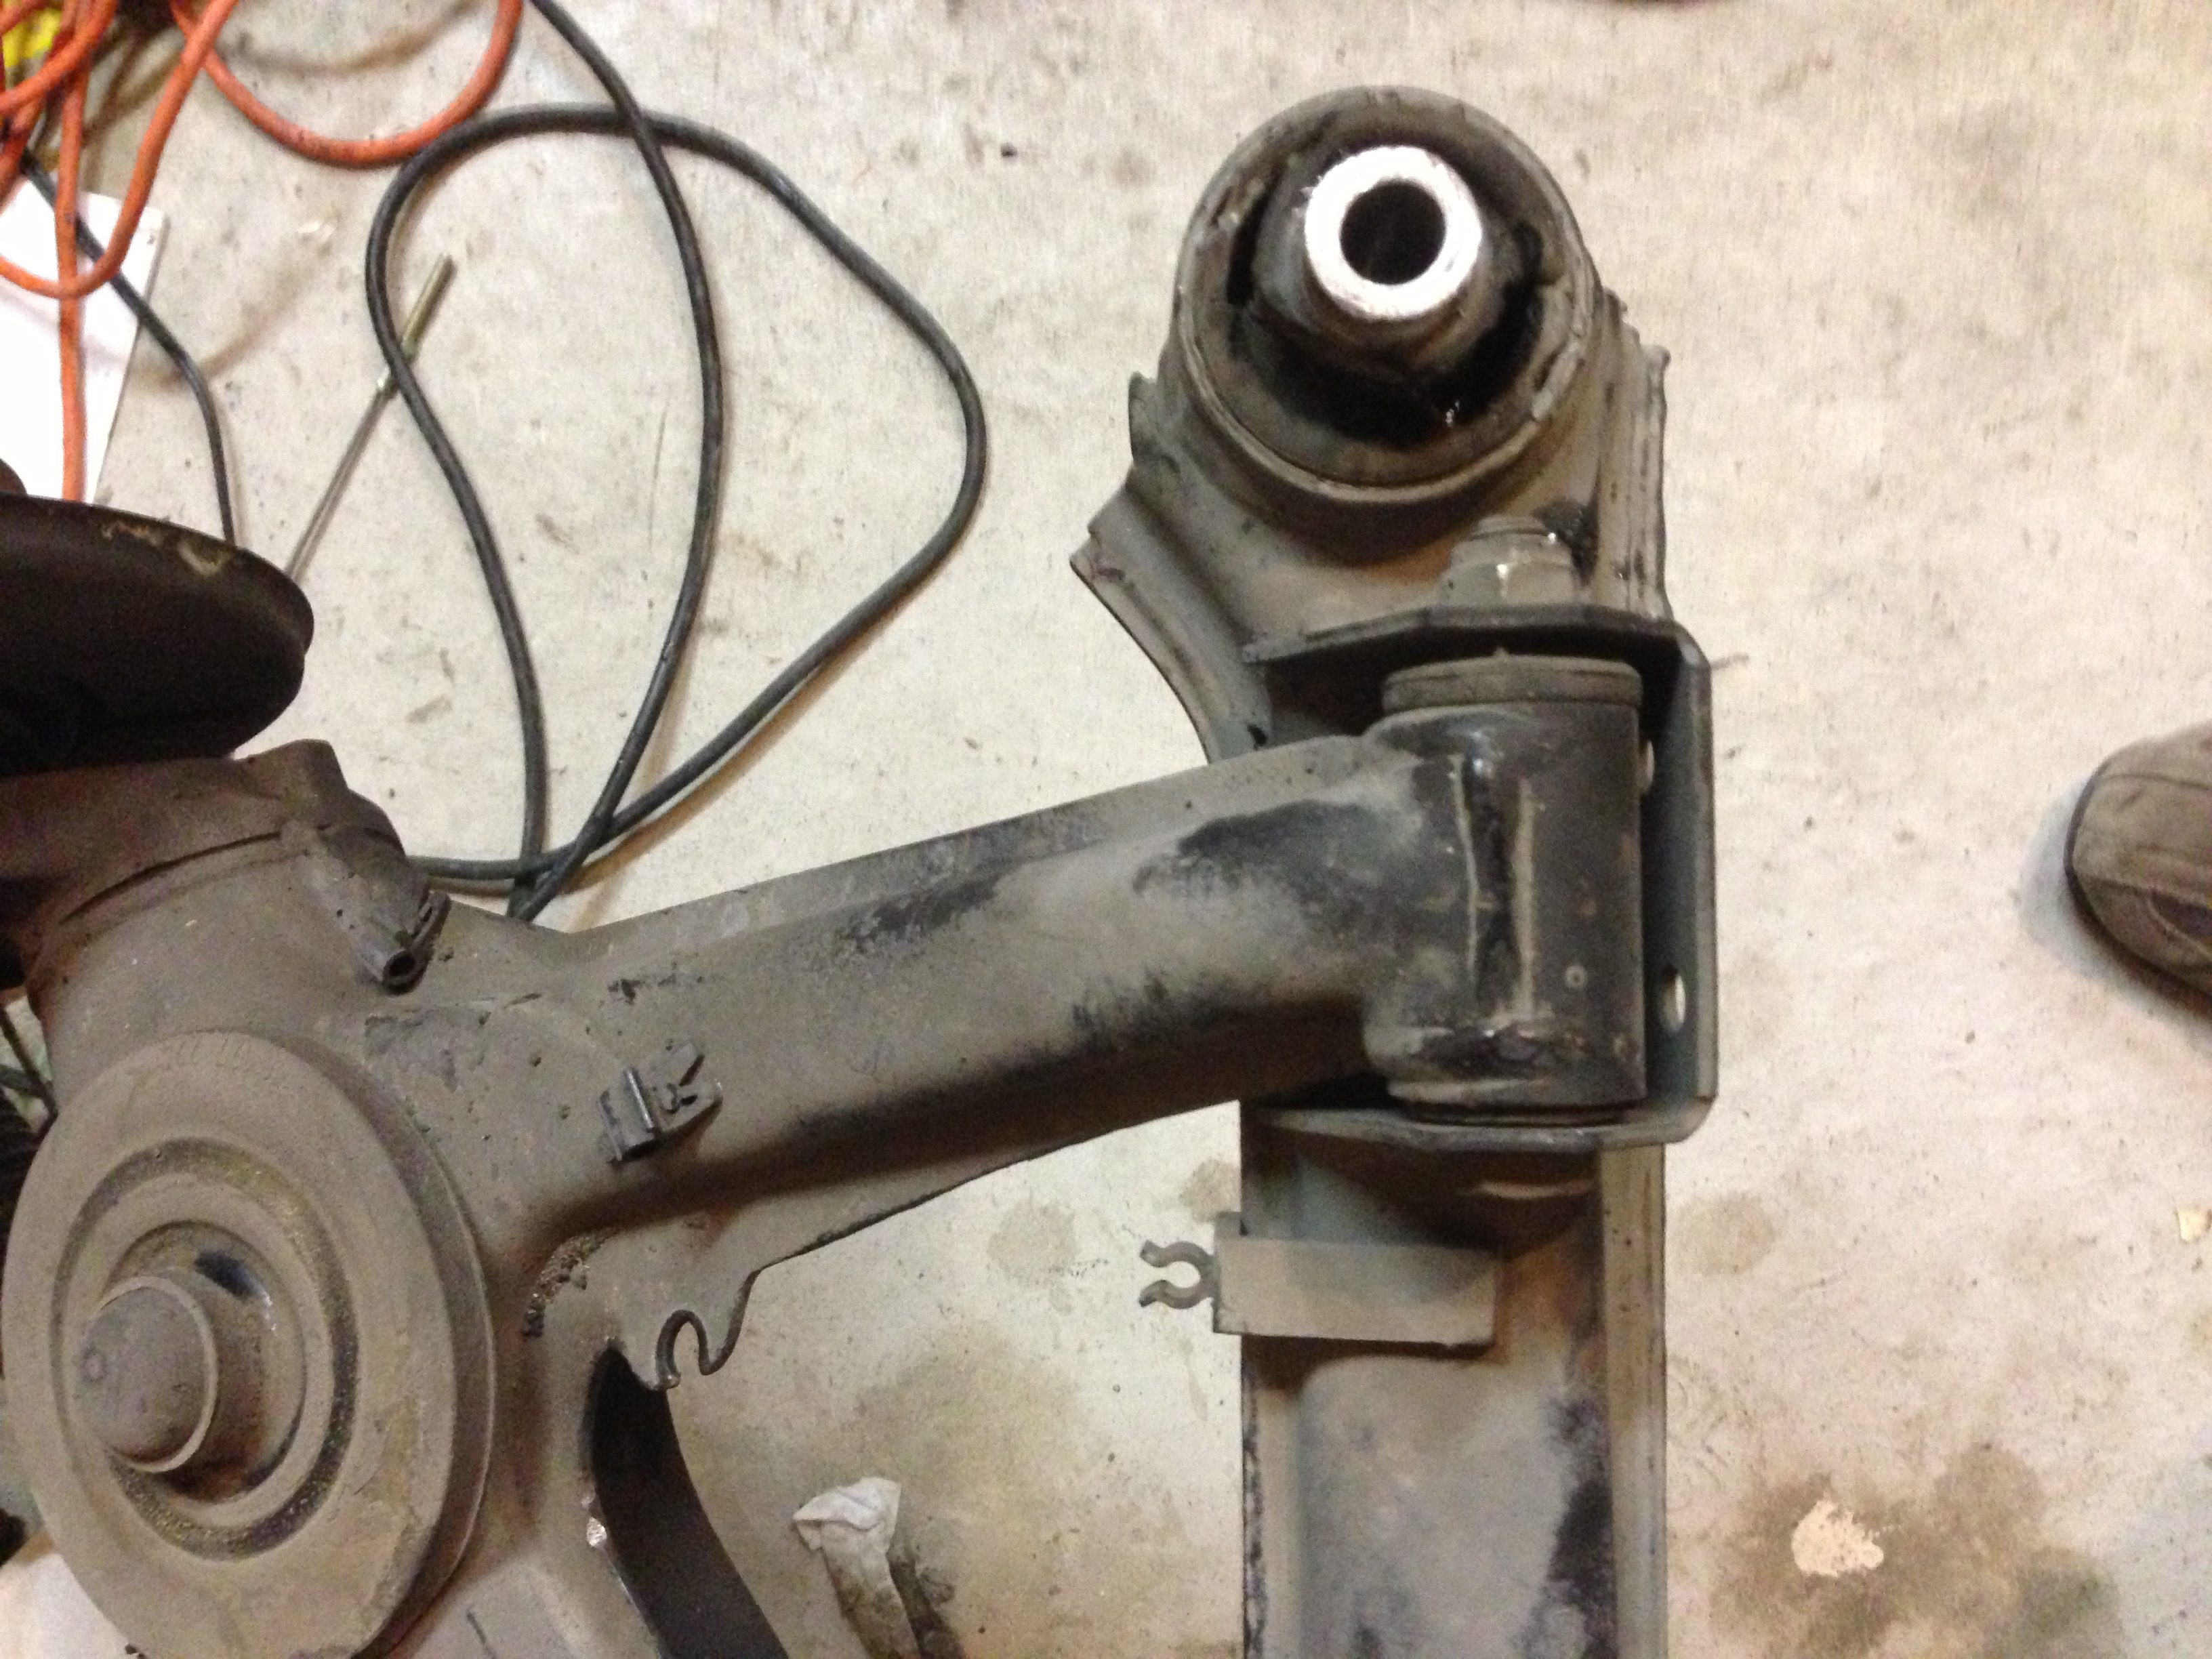
4. Undo shock bolts to let the trailing arms drop
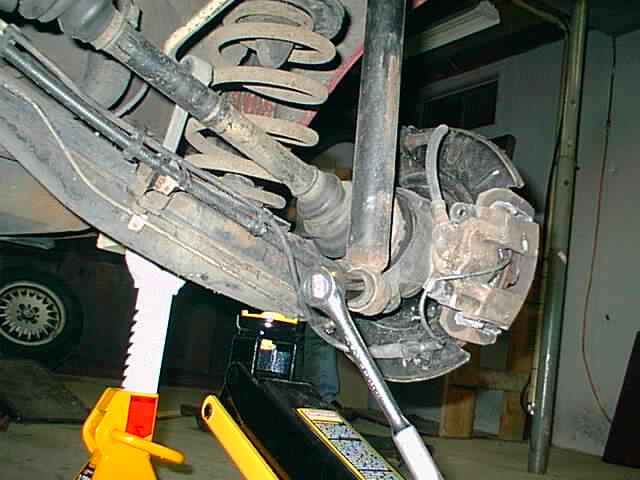
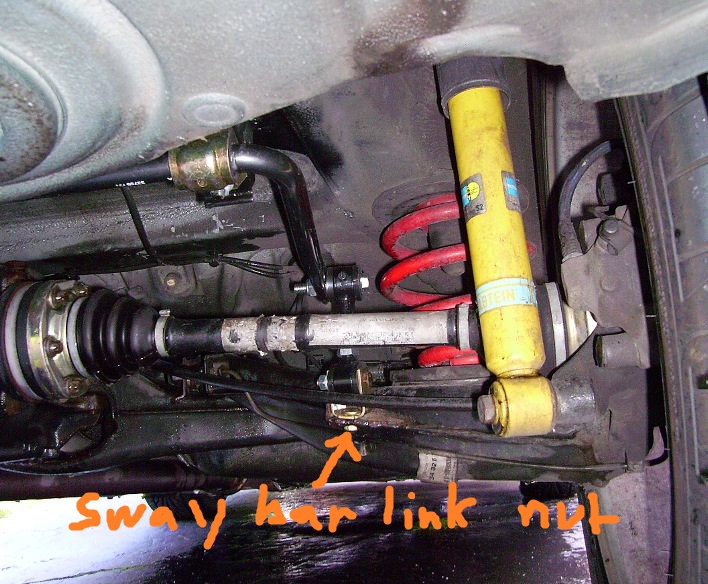
5. Detach rear sway bar links from the trailing arms via a 13mm nut.
6.Disconnect ABS sensors from both trailing arms, make sure to move those sensors safely away from the trailing arms/subframe assembly so they dont get snagged
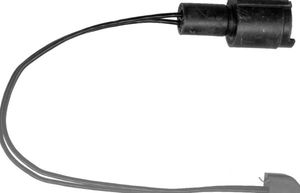
7. Disconnect passenger side brake wear sensor, and make sure to safely move the cable away so it does not get snagged, the sensor disconnects from the body side wiring at a connector that looks like this:
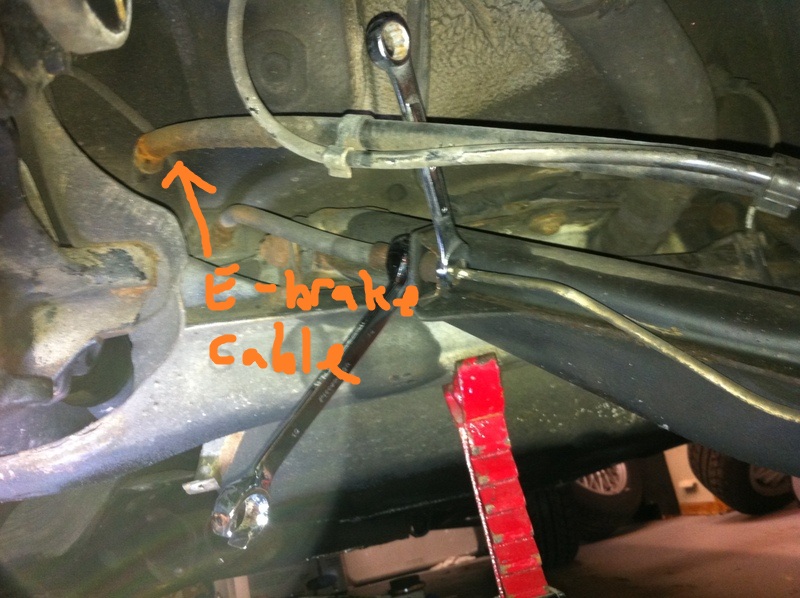
8. Undo brake lines

9. In the interior, undo emergency brake cables, then pull the cables from the rear of the car out of their respective tubes; to access the nuts below the e-brake lever just lift up on the accordion. To remove the trim around the lever all you have to do is remove the rear ash tray where you will find a 10mm nut, undo this nut and the whole trim assembly pulls out of the center console.

10. Remove the rear bench seat by pulling up hard on the front of the bottom bench, the bench is clipped in and there is nothing else to undo.
11. Remove the big subframe nuts, thread the nuts back on slightly, then hit the nut with a 5LB sledge hammer, this will force the bolt up into the body in the rear bench area. Proceed to pull out the bolts.
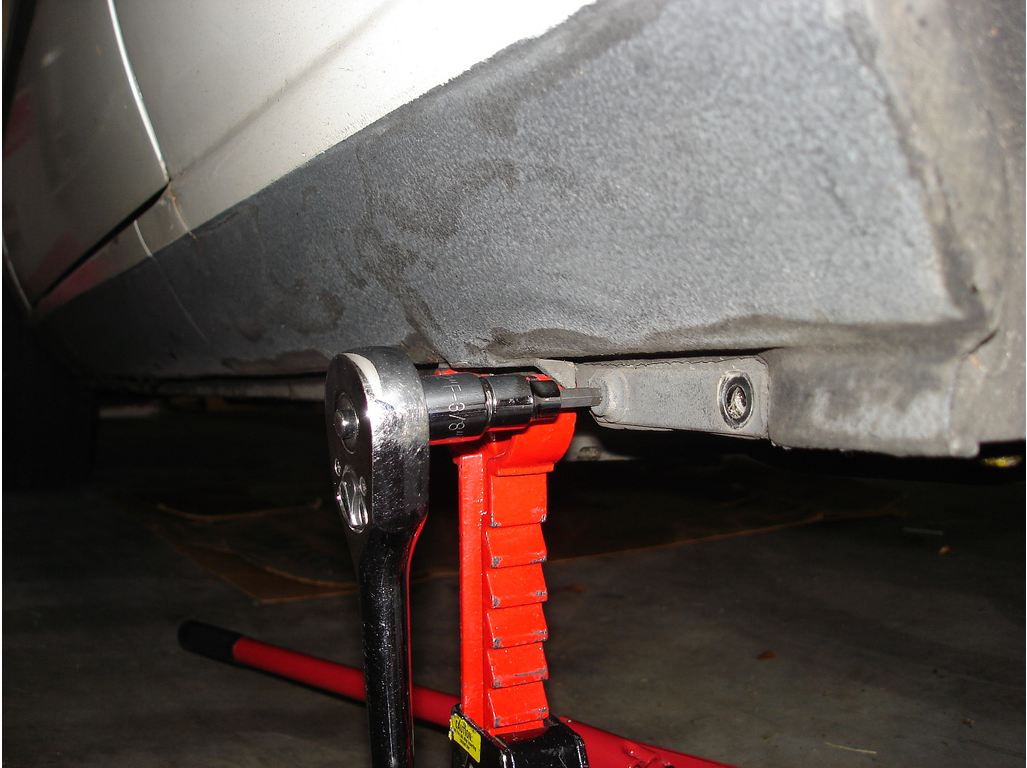
12.After both bolts and nuts have been removed, undo the side mounted bracket (2 allen bolts)
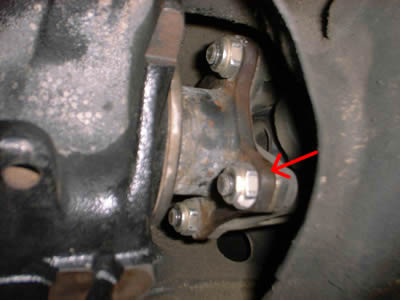
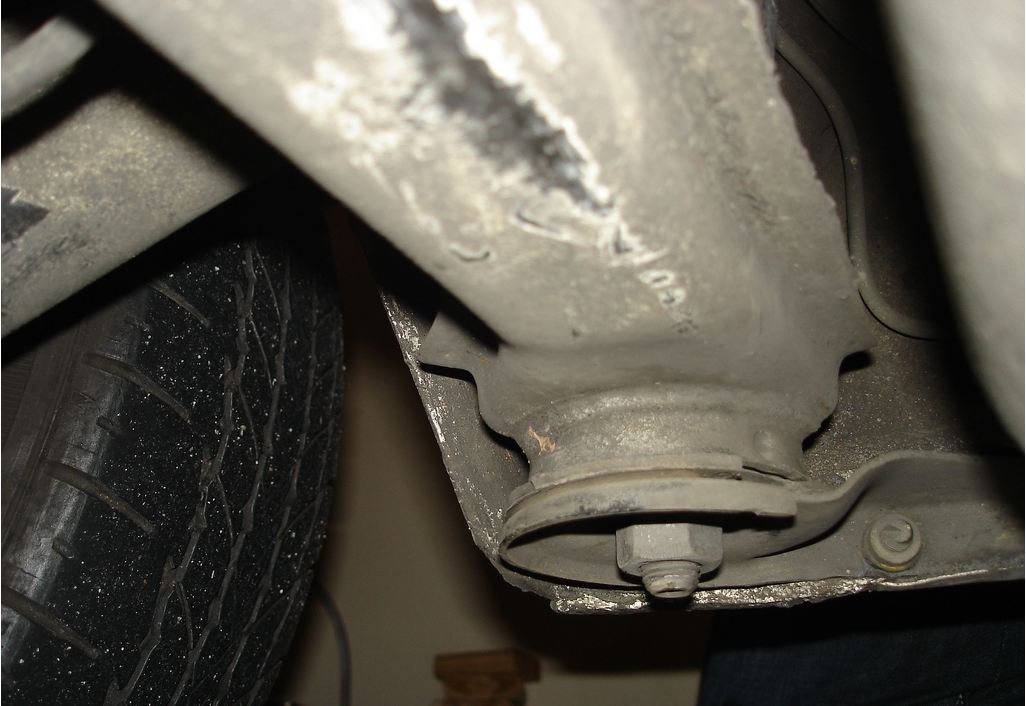
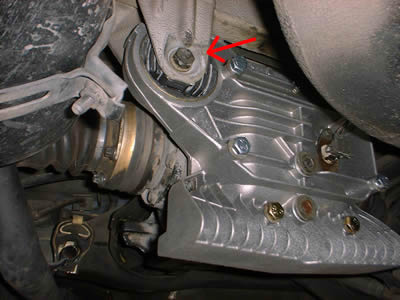
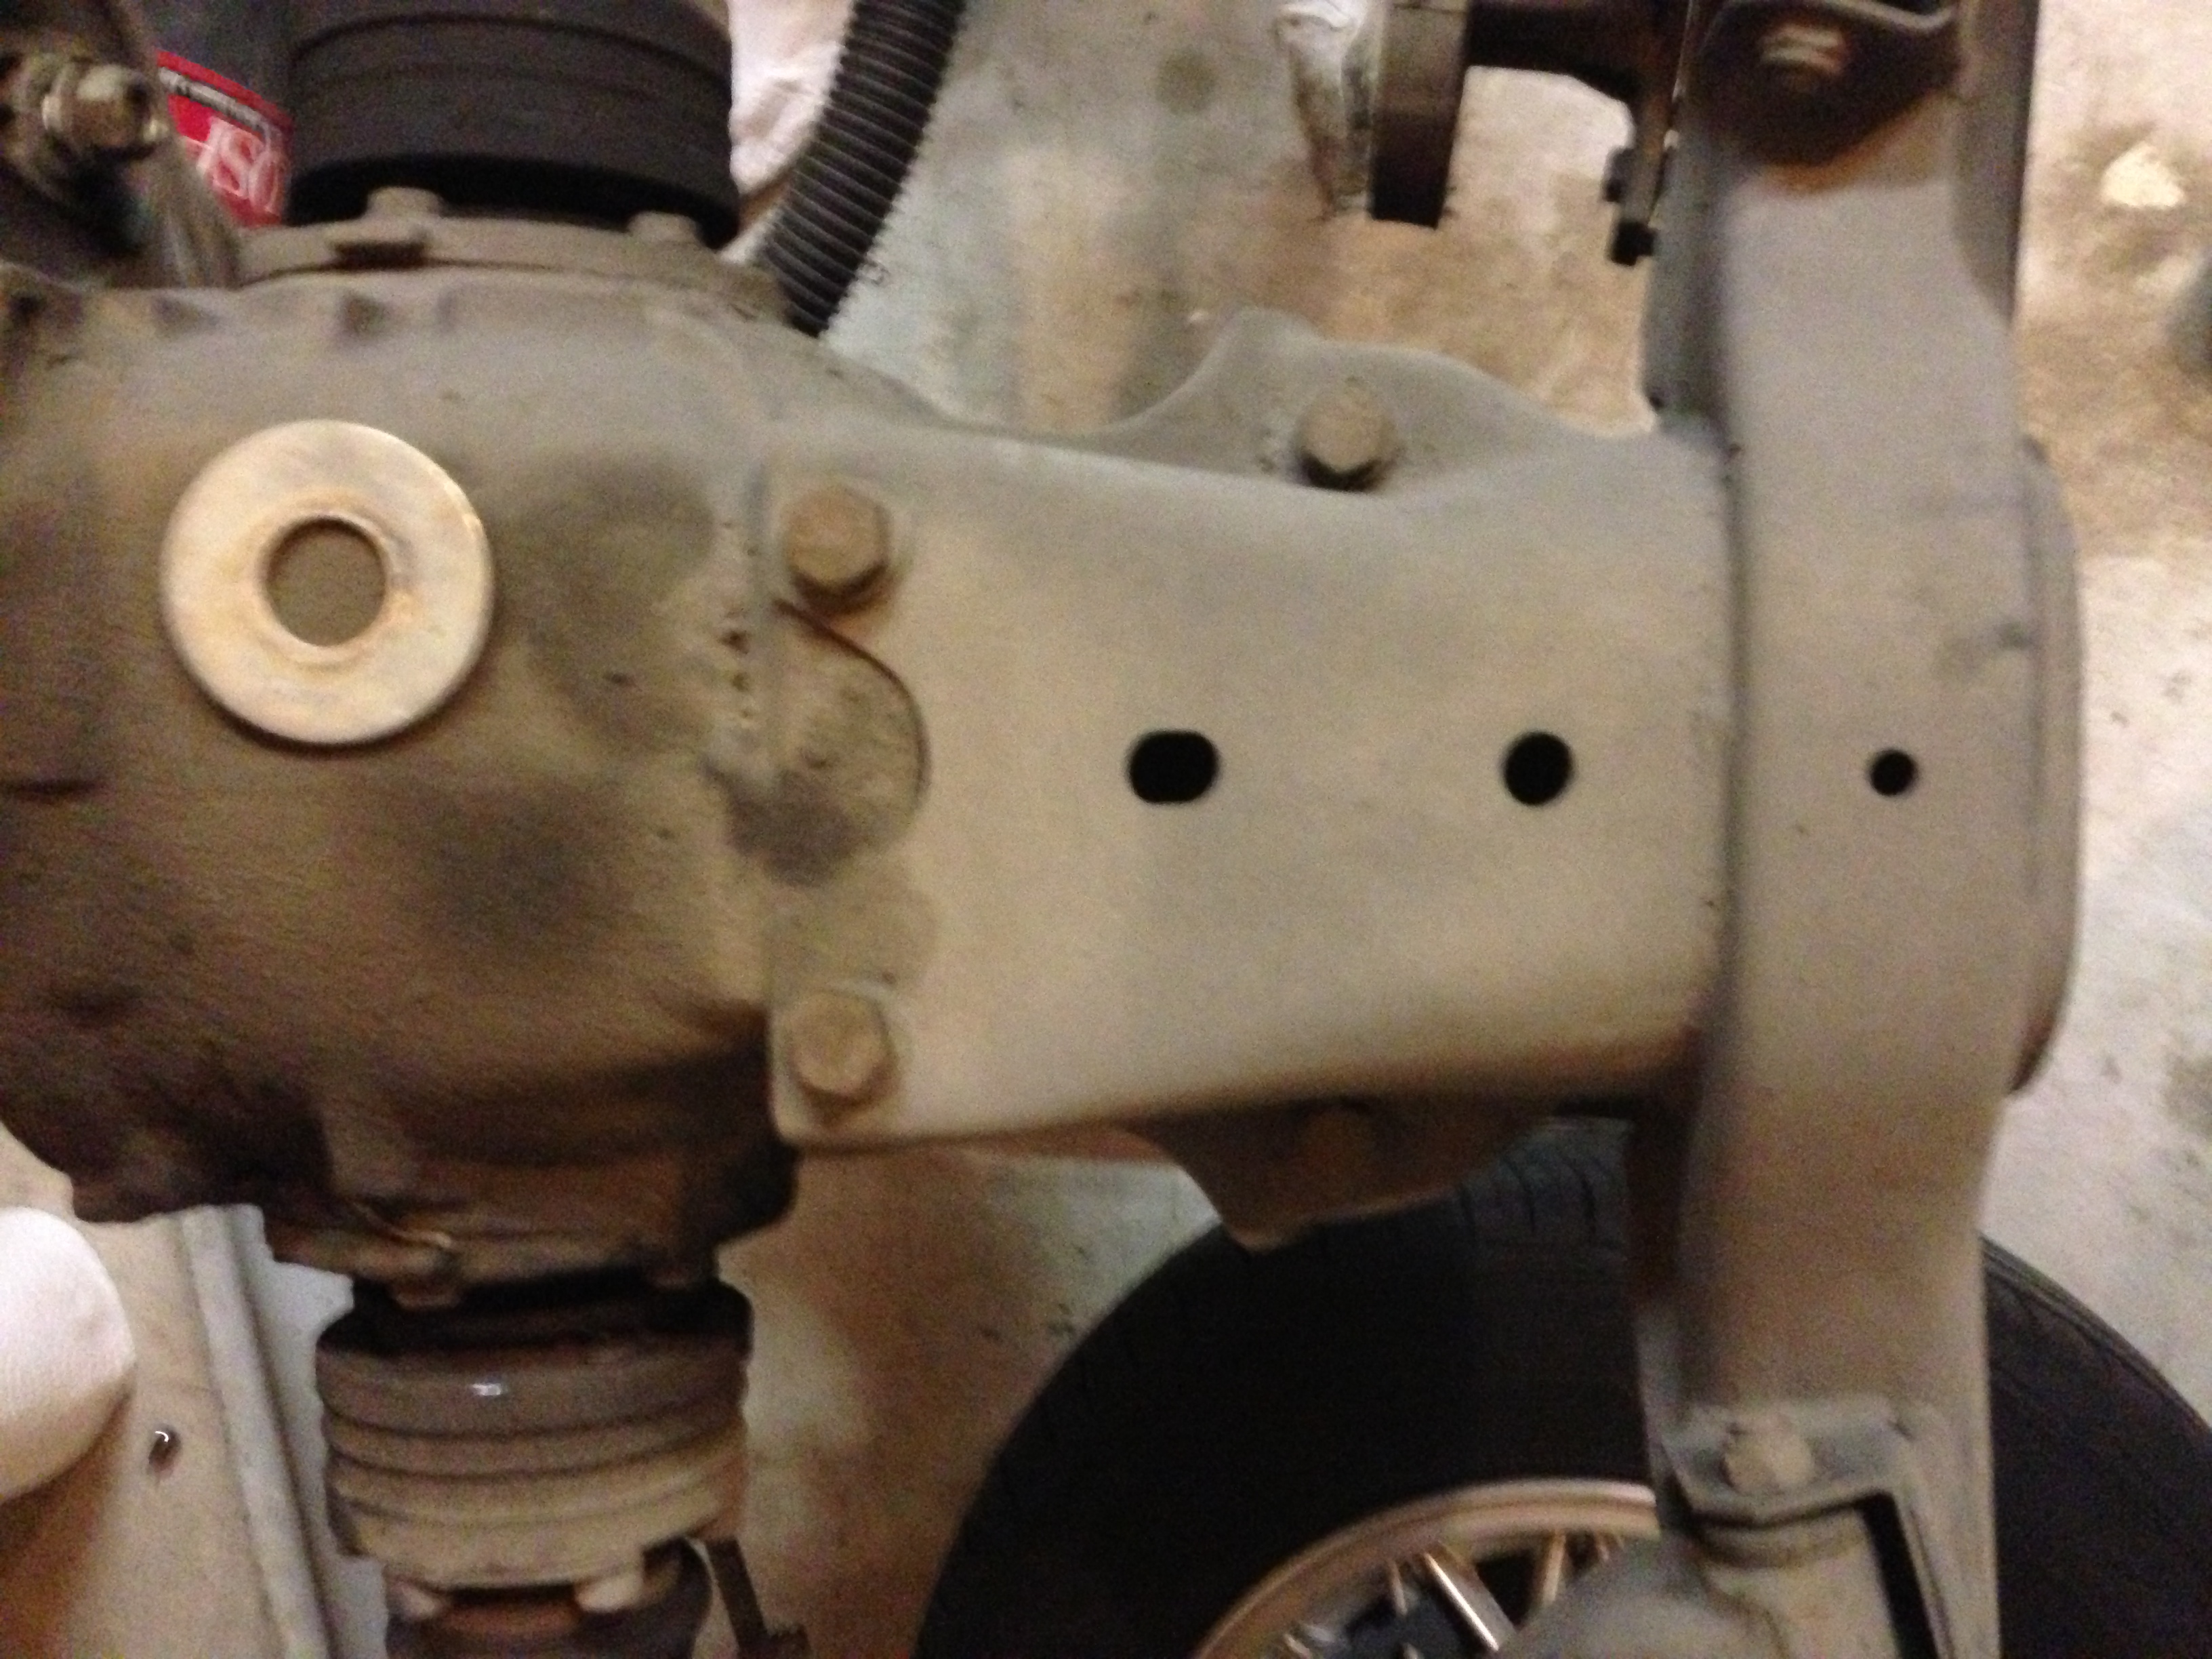
13. Remove the bolt and nut holding the differential to the body:
14. Now you can slowly lower your jack (and thus the subframe assembly), do it slowly so you can check that you didn’t forget to disconnect anything and that nothing is getting snagged.
To replace the subframe bushings:
15. Remove 4 bolt bolts holding subframe to diff, and 4 bolts+nuts holding trailing arms to the subframe.
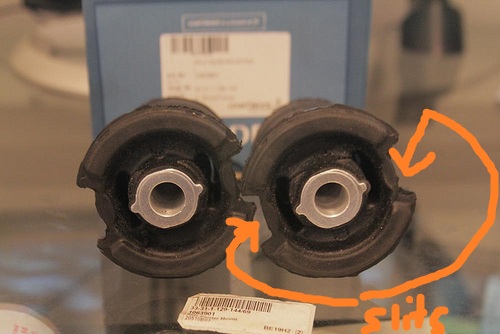
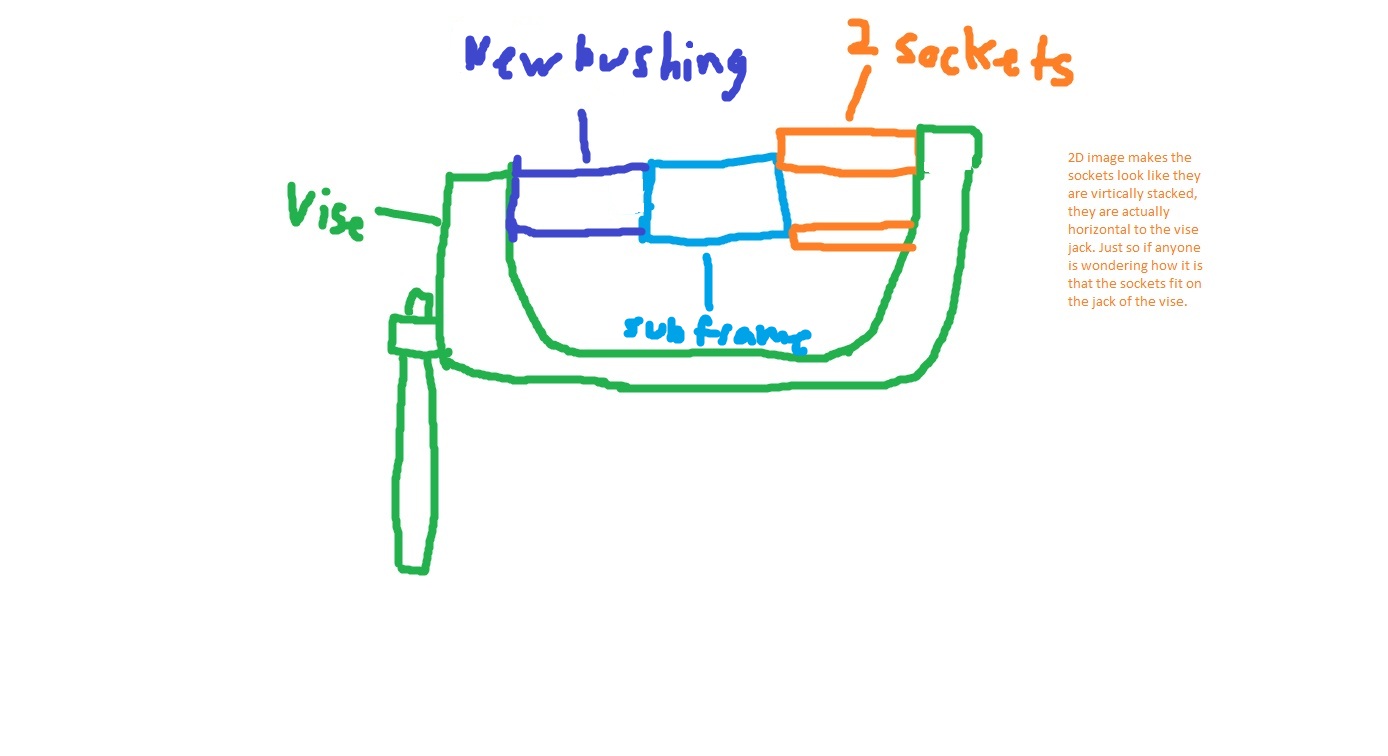
16. Remove the stock subframe bushing by making this setup on a bench vise:
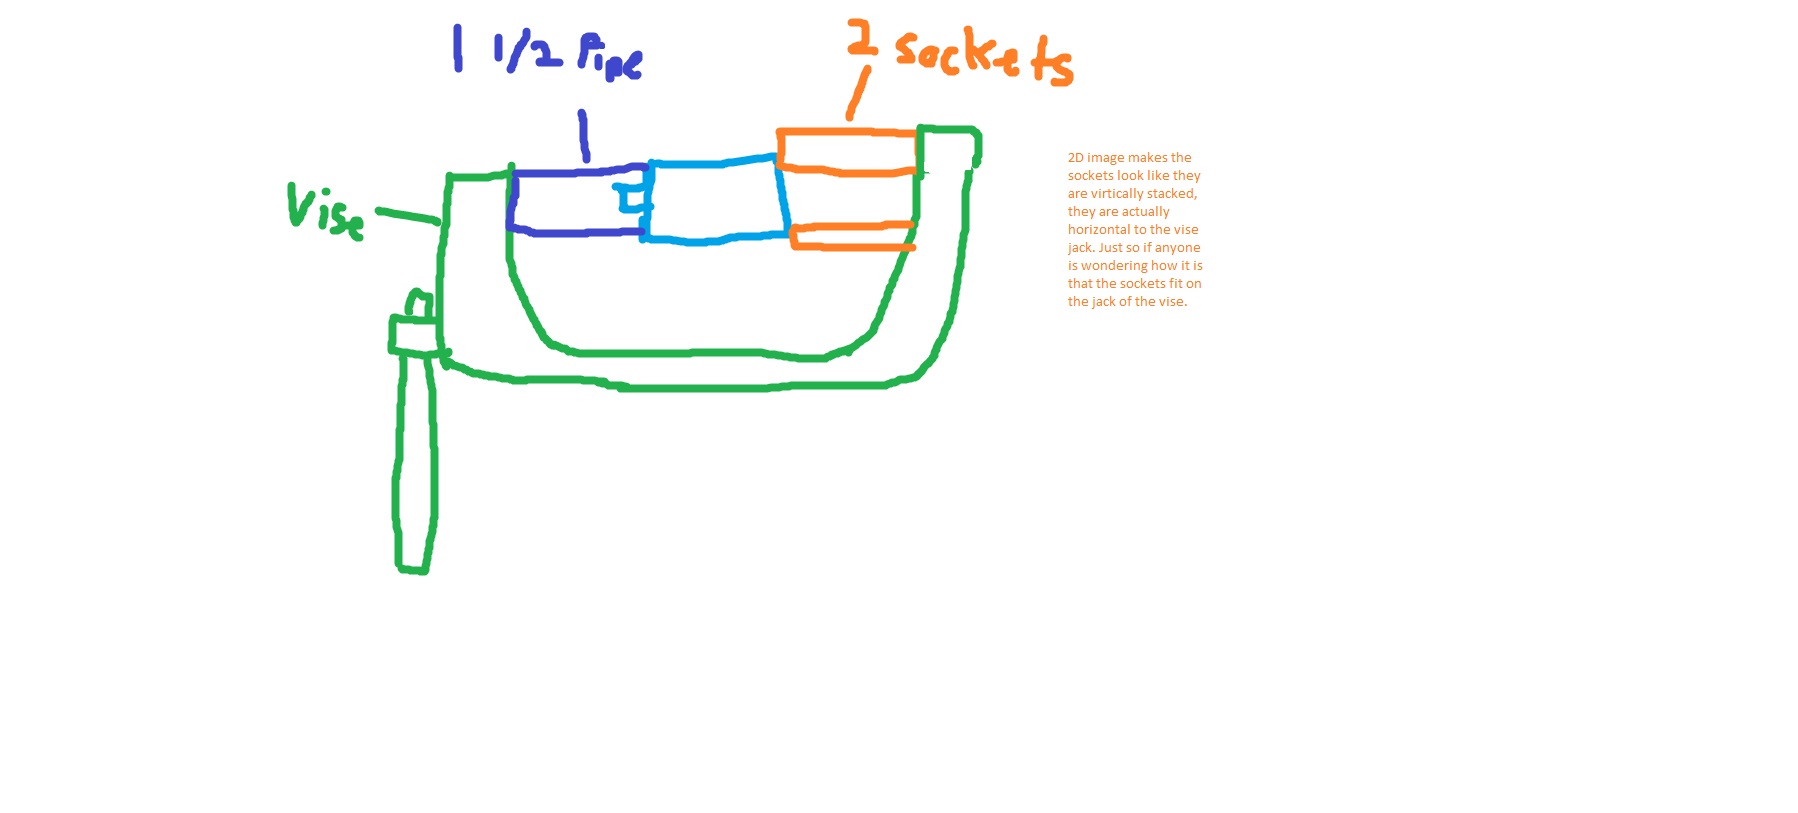
The sockets go in these slits
Have a helper hold the subframe while you set everything up.
17. Aftermarket bushings usually slip back in by hand, however if you are like me and are putting stock bushings in then put lube all around the outside of the bushing, then looking at the diagram above, imagine the 1 1/2 pipe becomes the bushing, (purple piece, and so I wouldn’t have to redraw the diagram the subframe tube has been flipped, to ensure the bushing is going in the correct way; the correct way meaning the same way you removed the bushing (lip points down) is the same way you install it). Initially you dont need the sockets to get the bushing in 90% of the way. The last 10% the aluminum middle piece wants to stick out, and hence you will put the sockets on the tips of the subframe tube to allow the bushing center to be pushed the rest of the way; no slits to this time, you can put the socket anywhere on the edge of the tube since the sockets are now on the back side.
Installation is the reverse of removal, REMEMBER TO BLEED YOURS BRAKES after everything is all back together and before you put the wheels back on.
I found this youtube video to be great at explaining the process:
Here are some torque specs that may help you:
Driveshaft to diff, bolt and nut – 72 N m (53 ft. lb.)
Guibo bolts + drive shaft bolts to diff – 46nm (34ft/lb) if 8.8 72 N m (53 ft. lb.) if 10.9
Center bearing to body, bolt 22 Nm (16 ft. l b.)
Diff to rear subframe – 110nm (81 ftlb)
Subframe to body (Big bolts) – 94.9nm (70ft lb) <<< I found this torque to be fairly low, most of the community agrees to tighten the shit out of the nut with a normal size breaker bar (like you would a lug nut)
Lower shock absorber mount to trailing arm – 72nm (52ftlb)
Brake caliper mounting bolts – 60nm (43ftlb)
stabilizer bar to trailing arm – 22nm (16 ftlb)
CV Hex bolts 58nm (42ftlb) < only relevant if you removed the half shafts later
Axle nut – 195nm (144ftlb) < only relevant if you removed the half shafts later
Brake line unions 10-15 Nm …… 7-11 ft-lb
Trailing arm to subframe bolt+nut 88nm (65ftlb)

Hello,
Thanks for the great website, and thanks for this how to on the rear sub frame. I have a problem and a question please.
I have followed the instructions for the e30 subframe removal, and I have a jack beneath the differential. Here is my problem: when I lower the jack, the subframe unit comes down about 1 1/2 inches and then just stops. The driveshaft is completely removed. I cannot see or feel anything that the subframe is catching on at this point. The big bolts that run through the subframe bushing are out, and the mounting plates are removed, but it looks as if the subframe is still “pivoting” near the subframe bushing area? Have I forgotten something? I followed the instructions to the letter and triple checked my work. Any assistance would be very appreciated!!!
Joey
The subframe bushings are likely still seized. The best course of action is to tap the aluminum sleeve and then thread in a large bolt and then use a vise grip slide hammer to hammer it out. This can be done after cutting away the rubber which will let the subframe lower and will only leave the aluminum sleeve.
When I did my subframe bushings, I found the install was easy – I cleaned the inside of the subframe tube with a wire brush and cordless drill. I lubed the bushings with a bit of soapy water, and you can actually use a rubber mallet and smack them in. A few whacks, and they were in all the way. No farting around with vises.
Just my 0.05 (we don’t have pennies in Canada anymore LOL)
thanks very much for this awesome writeup. just completed this job and could not have done it without your help!
Although you may have had success with a rubber mallet (especially if you were installing aftermarket bushings) the norm with tight fitting rubber OE and OEM bushings will not aid well to a hammer. A vise or a press makes for a much easier job.
great write-up! one thing you left out to disconnect is the speed sensor wire to the diff.
This info was helpful. At first I did not understand the double socket setup for the subframe large end bushings, but after I figured out the notches on each side, i got it to work. I made a small tool from 3 pcs of 1″x1/4″ steel bar – a flat piece about 6″ wide and welded 2 vertical legs to it about 1.5″ high with the edges spaced just a smidge less than the bushing diameter (measured at the inside of the 2 notches – about 2.375″ apart. This worked great to get them out the first 1.5″, then I could get 2 sockets in and get the bushings out the other 1″. All this was done in a large vise with a small pipe extension on the vise handle. I have a photo of the tool I made and the sockets in the vise setup if anyone wants the photos. I am not sure how to add them to this post. Feel free to email me. Always nice to do it yourself and not have to take it to some machine shop.