
Bringing it back to the basics this week.
Changing brakes on any car with disk brakes is a routine maintenance item and is certainly a job for a novice DIY’er.
However, for something so routine, there are multiple ways to perform the job. However, even though there are multiple ways to theoretically get to the same end result, there is only one real painless correct way of doing it.
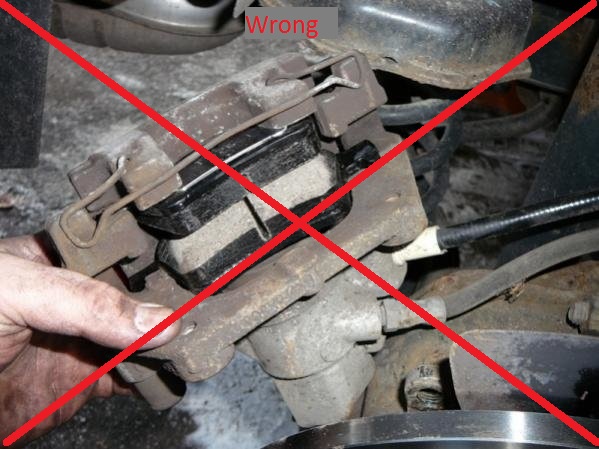
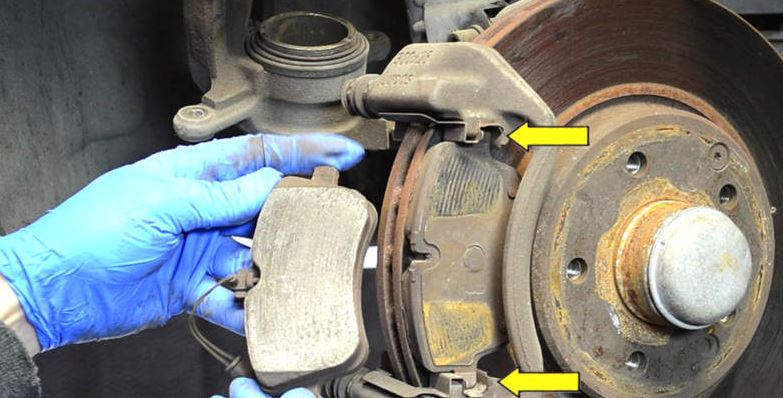
A common point of confusion is the relationship between the disk rotor, the disk caliper, the brake pads, and the caliper carrier.
Questions that run through a novices head: Do you remove the caliper carrier with caliper? Do you remove the caliper from the carrier? Do you insert the pads into the assembly then put the caliper carrier back on? Do you put the caliper carrier on first then the pads? Etc. Etc. Etc.
On any car equipped with disk brakes, the methodology is the same.
Follow these easy steps:
Brake pads only:
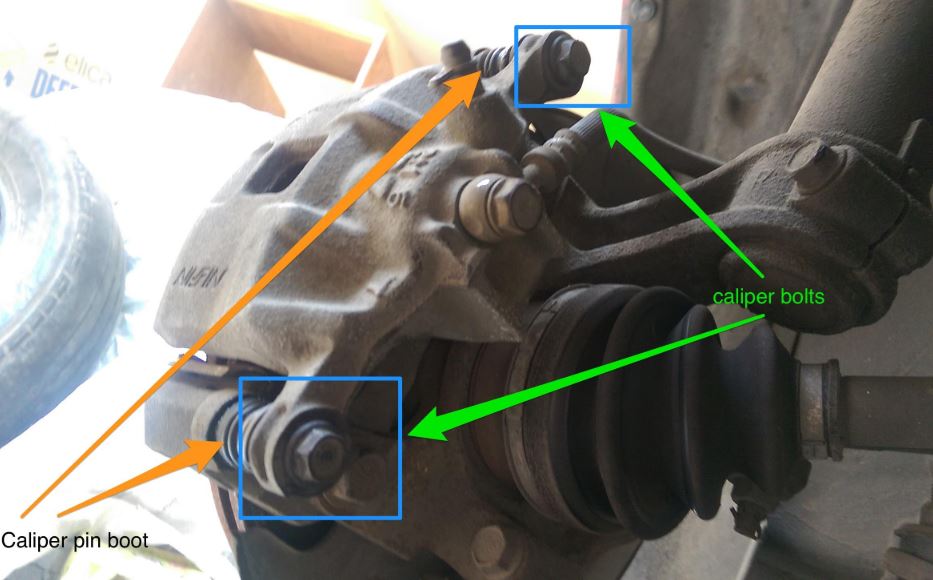
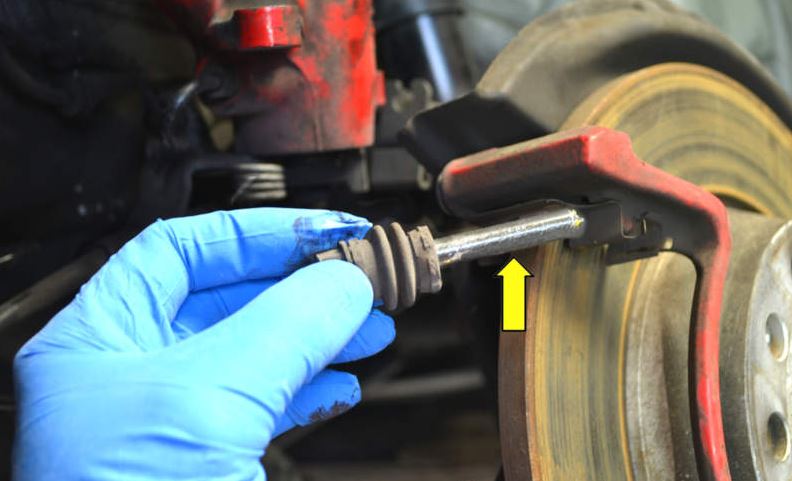
1. Find the two rubber boots on the caliper. These boots protect the sliding pins.
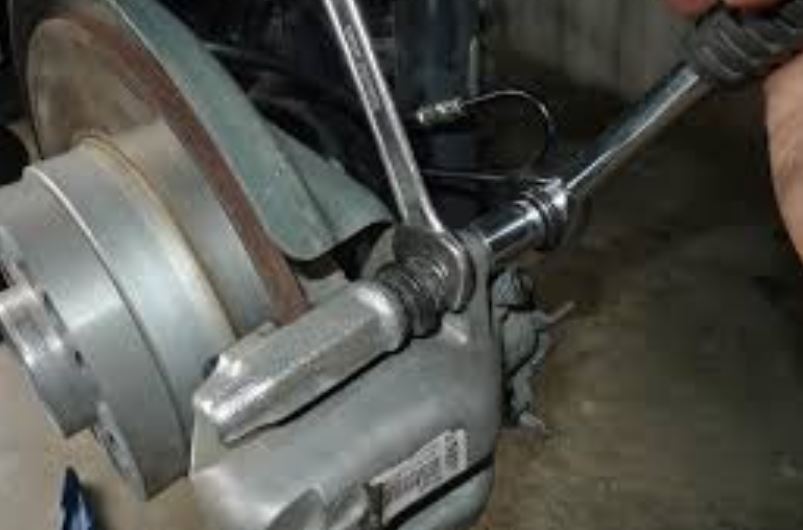
2. Remove the two bolts that screw into the hollow threaded passage of the sliding pins. Between the rubber boot and the bolt will be one ear of the caliper. To successfully remove these two bolts, use a wrench on the nut found between the rubber boot and the caliper ear to prevent the sliding pin from turning when removing the aforementioned bolts.
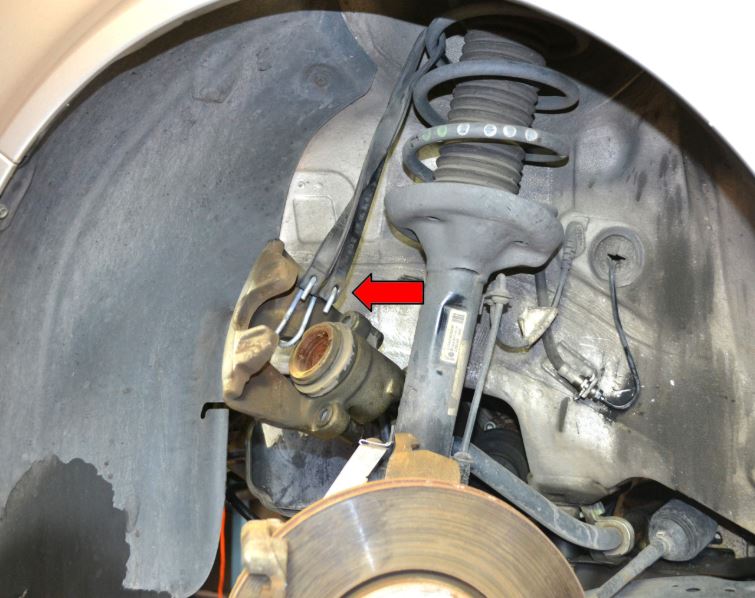
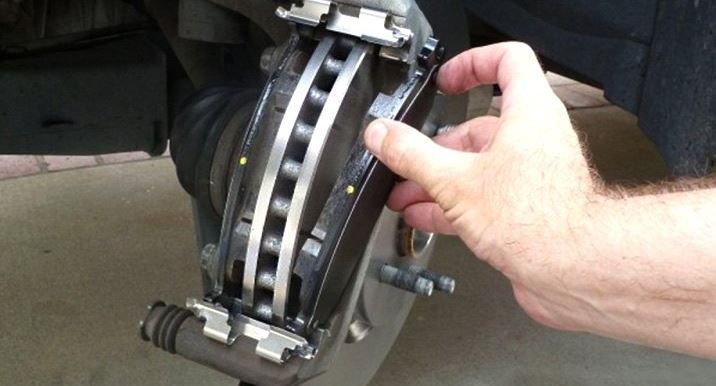
3. With these two bolts removed, you can now slide the caliper out and away from the caliper carrier. Use a hanger or bungy to suspend the caliper to prevent the caliper from putting tension on the brake line.
4. You will now see that the brake pads remain in the caliper carrier. Remove the brake pads and install new pads.
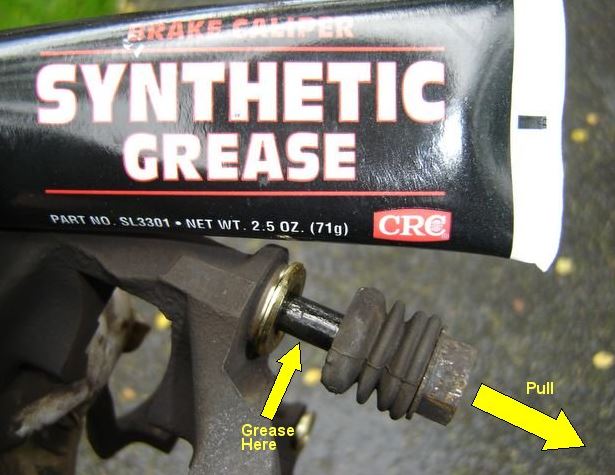
5. This step is optional but highly recommended. Lubricate the brake pads where the piston touches the back side of the pads, the area where the backside of the caliper touches the other pad, caliper sliding pins, and pad mounts. Note, that some brake pads come with new metal clip pad mounts, which should be removed (old) and installed (new) prior to lubricating.
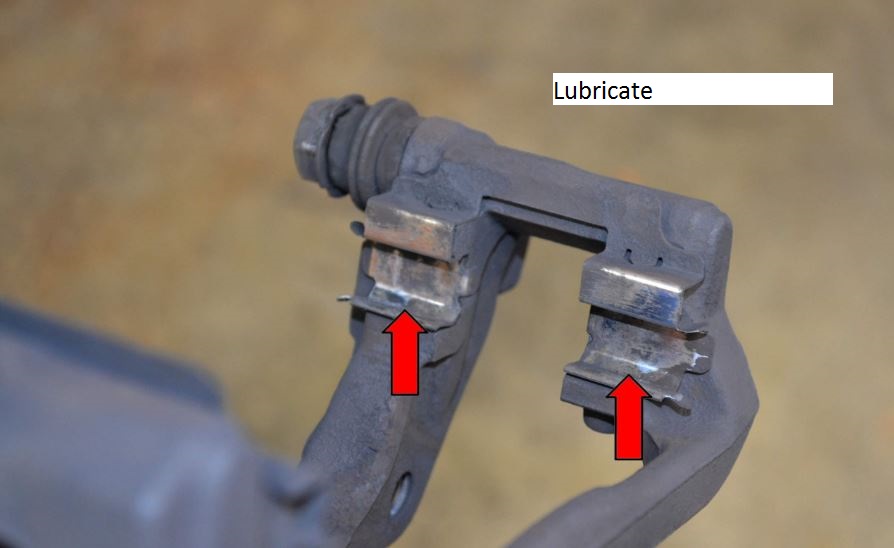
The caliper sliding pins, easily pull out by hand, the boot may make it feel like its not supposed to come out, but pull it off and the boot will pop off. When reinstalling the lubricated pin, just push it back in by hand until you hear/see the rubber boots seal on both ends. There is no need for any kinds of tools to get the boots to reseal, just push them back in!
———————————————————————————————————————————–
Continued brake pads and rotor:
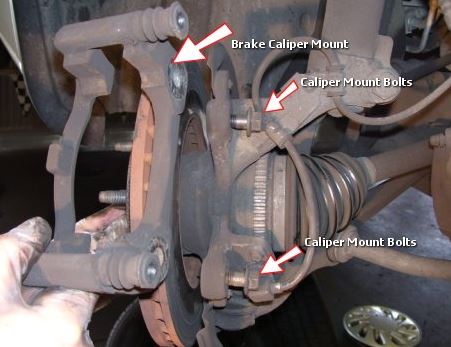
6. After removing the pads in step 4, undo the two bolts holding the caliper carrier to the axle knuckle.
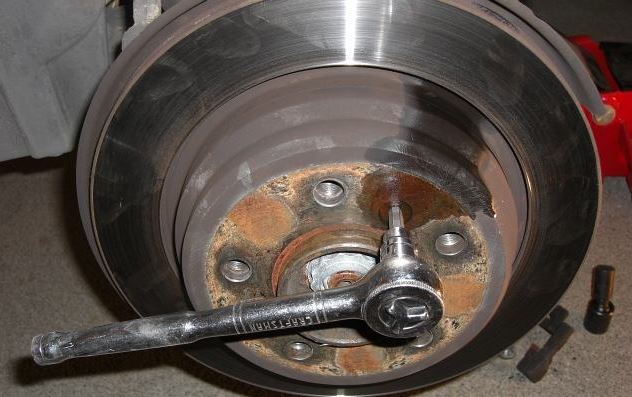
7. Remove the rotor set screw and then remove the rotor by pulling it away from the car. If the rotor is stuck, give it a few wacks with a rubber mallet.
8. Reinstall in reverse. New rotor, set screw, place the caliper carrier back on, insert the new pads.
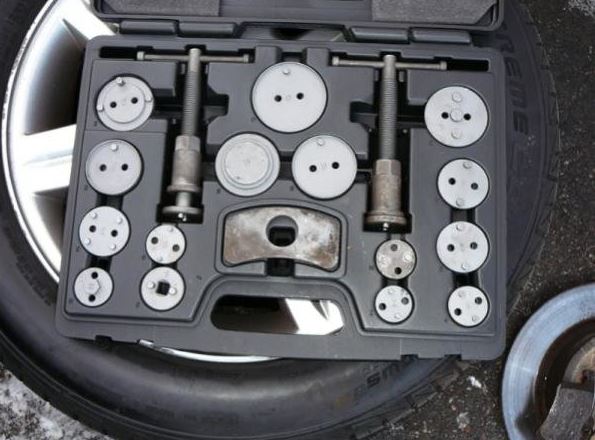
9. There are two types of brake caliper pistons, ones that push straight in and out, and others that twist while pushing. For the former, you can get one easy style of piston compressor. However, spend the extra 10 bucks and get the kit that allows you to do both types.
These kits come with two main tools, one for clock wise and other for counter clock wise, and multiple adapters to fit cars with the twist type calipers.
As you tighten the tool, it will compress the piston, allowing you to easily put the caliper back on (considering the new pads have more meat to them than the old pads).
For the twist type pistons, find the adapter that fits into the groves on the caliper piston. Once you have fully compressed the piston use a wrench on the tool to loosen it, as you wont be able to go in reverse with the tools handle (because that would undo what you just did).
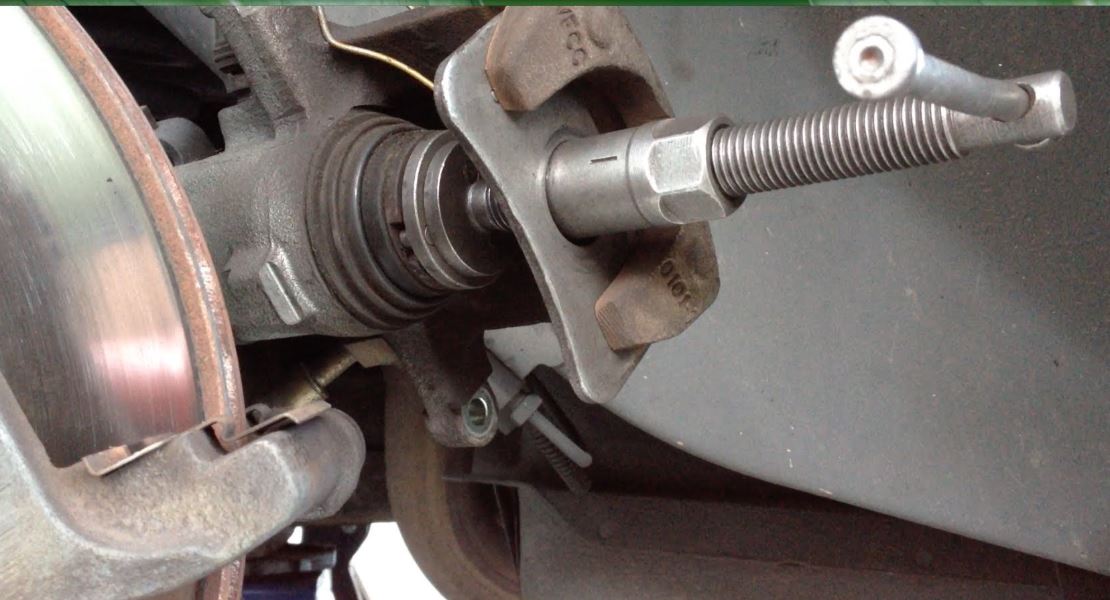
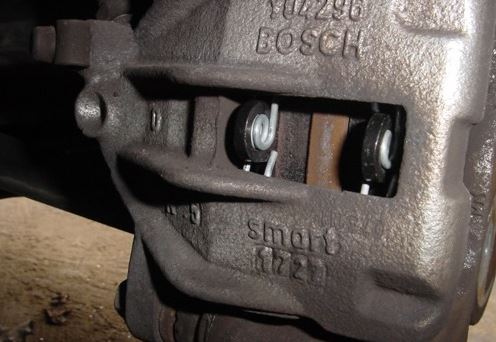
10. THEN put the caliper back on, and align with the caliper mounting points on the caliper carrier.
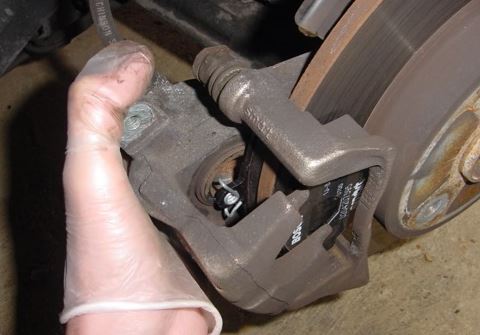
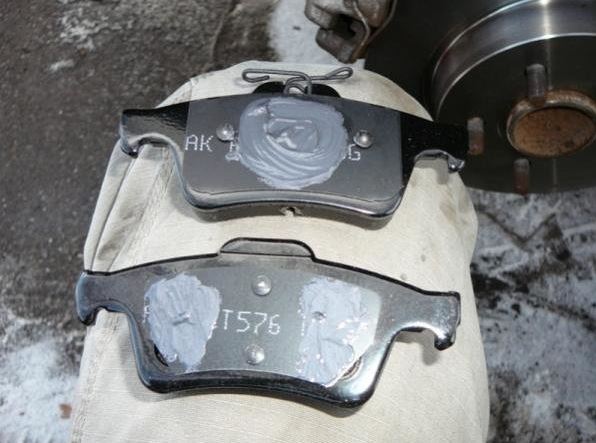
When complete, if your brakepads come with little springs on top of them, make sure the brake pad springs arent sticking through the caliper hole after reinstalling the caliper onto the carrier, they should look as pictured:

Recent Comments