
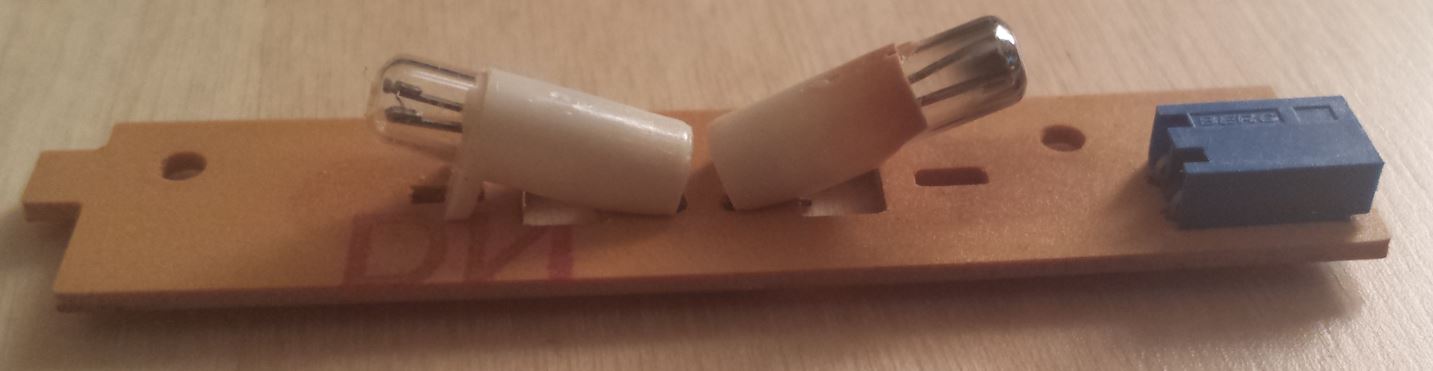
The on board computer (OBC) in an E30 uses two regular light bulbs wired in series on a removable circuit board to light up the display on the OBC. Because they are wired in series, if one light-bulb goes out both go out. The bulbs are not supposed to be replaceable as they are soldered in and normally require you to buy a new light bar from BMW at a cost of $50+. It is possible to unsolder and resolder new bulbs, but if you are going to go through that effort than you should upgrade to LED’s. The advantage to LED’s is that they will last almost indefinitely and are very inexpensive.
Stock burned out OBC light bar:
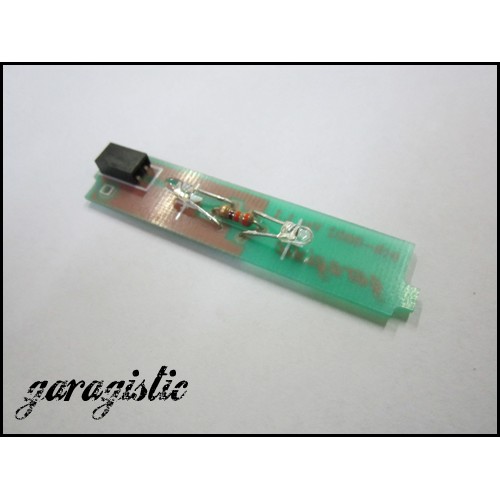
For those looking to buy a ready to go LED light bar:
Garagistic 13-button OBC LED conversion
For those who want to solder up their own light bar:
Taken from http://www.iprimus.ca/~trauttf/temp/OBC/OBC-LED.htm:
Two LEDs and a resistor are put in series. The LEDs are super bright orange (620 nm) LEDs with a 45º viewing angle. I bought a pair from Mouser Electronics for 50 cents each (plus shipping). You might want to order an extra one or two just in case you break off one of the leads. Mouser stock # is 512-MV8742. The resistor is 390 Ohm, 1/2 Watt and five of them (that’s the way they’re packaged) at Radio Shack costs 79 cents.
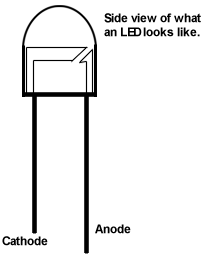
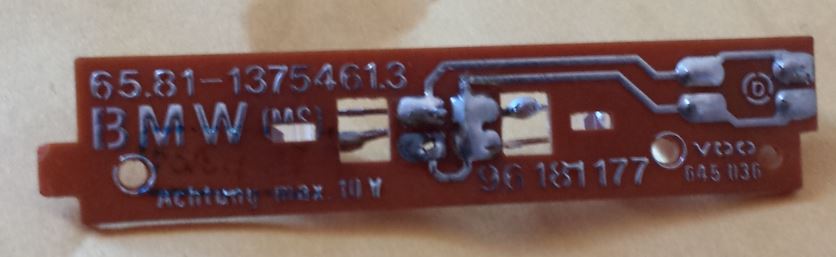
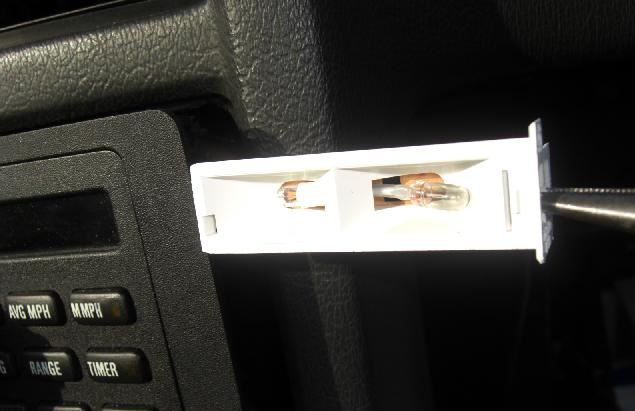
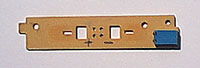 This is what the little PCB looks like after you unhook the white plastic piece and you de-solder the bulbs on the bottom of the board. You can discard the incandescent bulbs and their little white holders; you won’t reuse these. With a pen I marked where the positive and negative (ground) connections are on the board. Make sure to connect the LEDs with the right polarity — they are diodes. You can kill them if you reverse them. The anode is the lead that is supposed to get the positive voltage. One way to recognize the anode is that the lead is a little longer. The name of the other lead is cathode. Another way to tell anode and cathode is to hold the LED with its legs down and you look at the insides; the anode ducks under the cathode. (See the figure below for clarification)
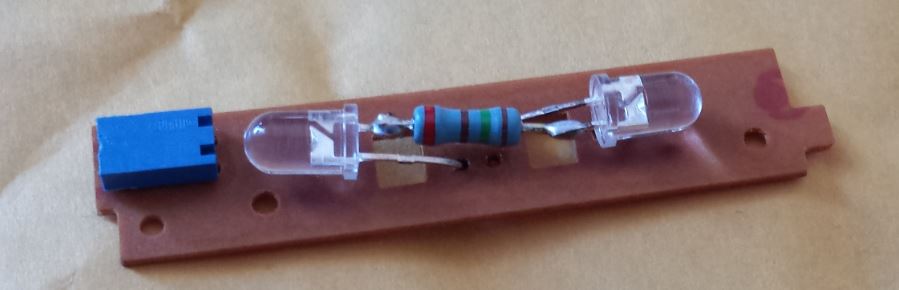
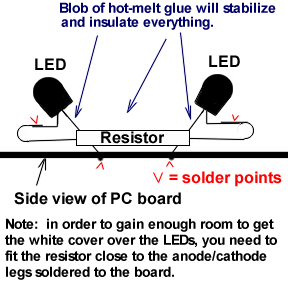
Now, you stick the anode of one LED through the hole that is marked + on the PCB board and solder it on the other side. The cathode of that LED is trimmed short (about 3/8″ to1/2″ long). With the other LED, you stick the cathode through the hole that is marked -, solder it there and trim the anode short. Move the LEDs so that they stick up at about 15º. Now, take the resistor and fold the leads back in sort of a loop. Cut them about a quarter inch from each other, so they won’t be able to touch. Now, solder the resistor between the short cathode from one LED that is sticking out and the anode of the other LED. You’ll have to solder this one fast, or things will overheat and die. You need to tuck the resistor in close to the anode and cathode legs that are soldered to the board. The resistor will almost be touching these leads. If you don’t position the resistor in this way, you’ll have a hard time fitting the plastic reflector/cover over the LED’s. It’s kind of a tight fit. See the diagram below for more detail.
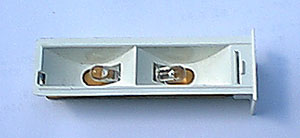
Now you can clip the white plastic reflector plastic back on, stick the light assembly back in the OBC, turn the ignition key on and behold! You should never have to change the backlight again.
Most guides I have seen completely over complicate the process for replacing the light bar, this is the most minimal and quick way of doing it:
Step 1: Open your glove box and remove this plastic panel; you do not need to remove it fully, you can just push it to the side.
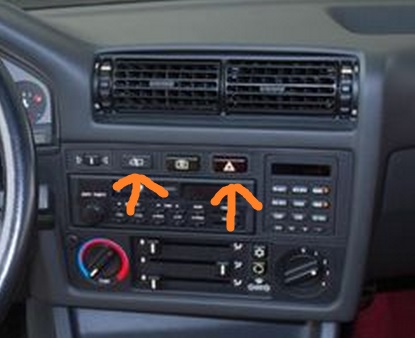
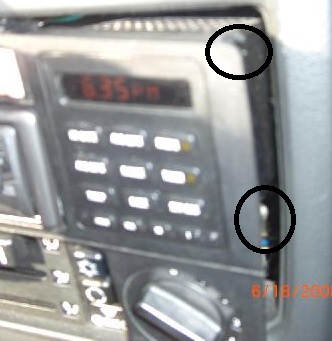
Step 2: Reach in through where the above panel was and push out the the following two buttons, they just push out there is nothing more holding them in:
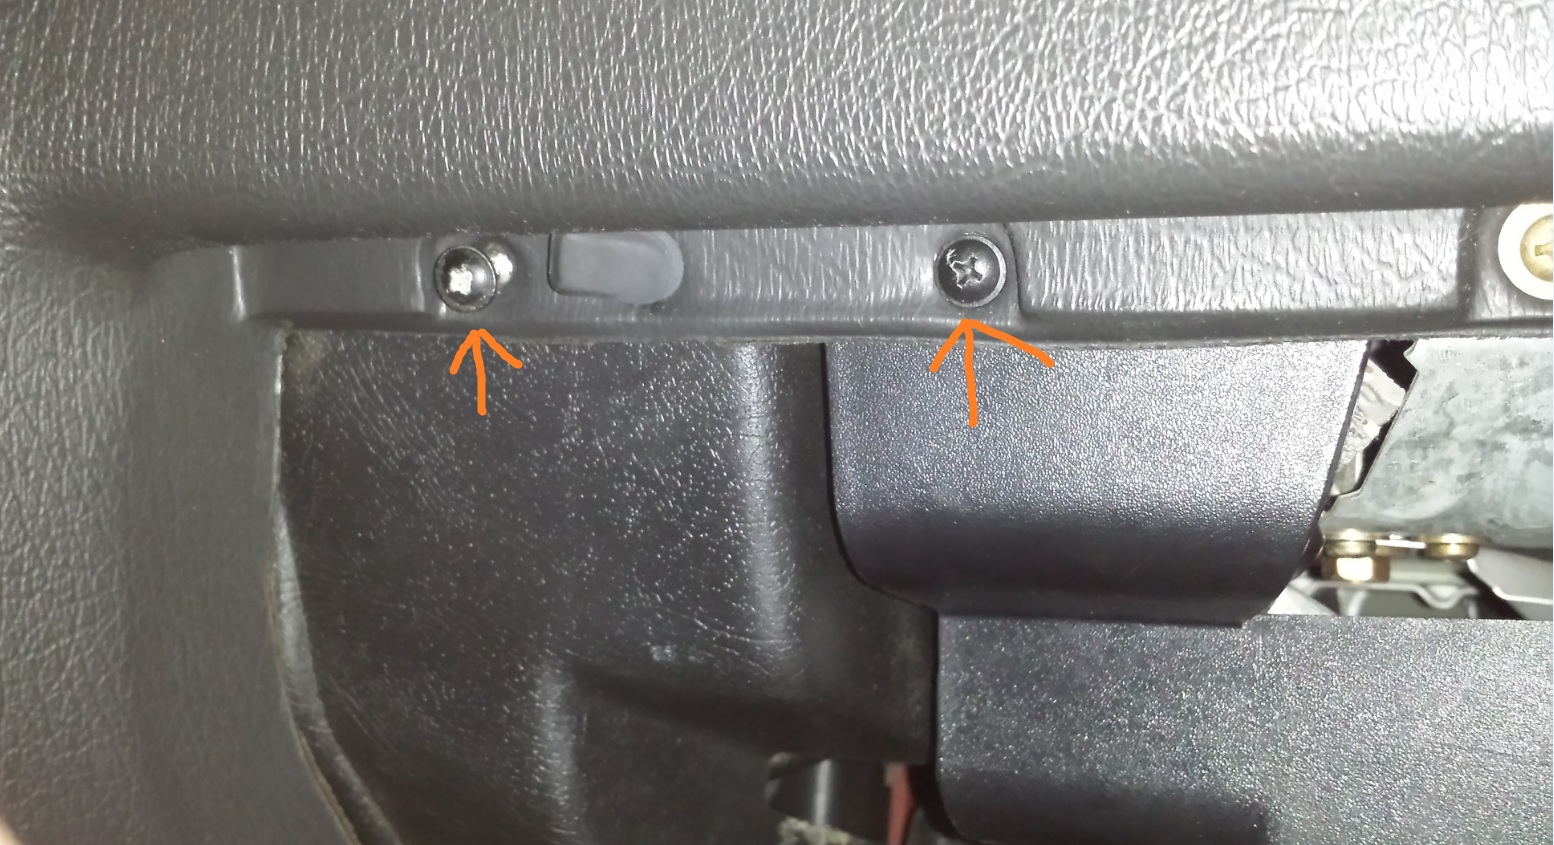
Step 3: Underneath these two buttons you will find screws that you need to undo (no need to remove radio at any point):
Step 4:
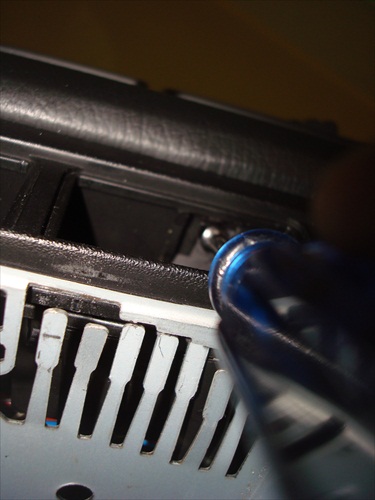
Undo the screw found here (no need to do the other side):
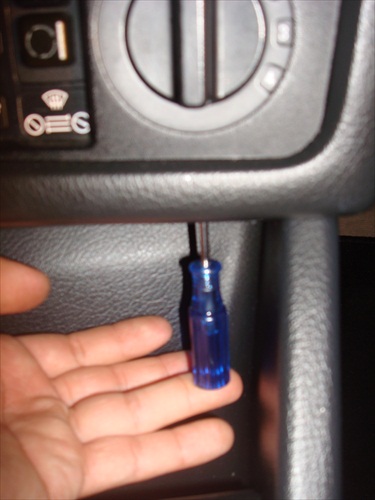
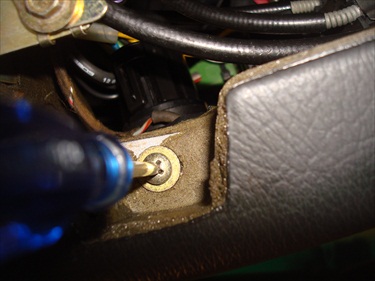
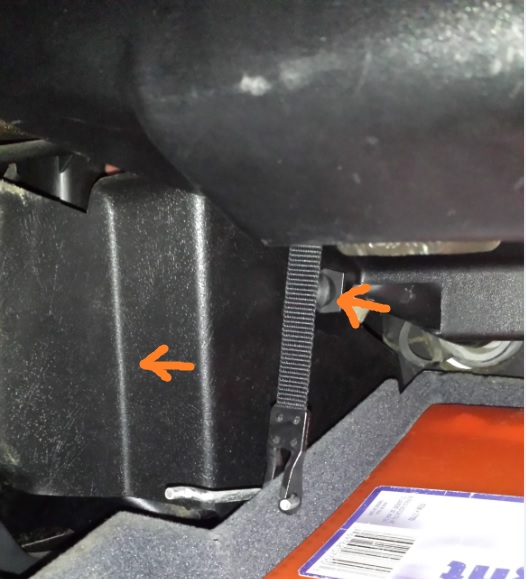
Step 5: reach through the glove box hole and push on the back of the OBC and using a small screw driver through the glove box undo the two screws found here:
Step 6: Now push on the right side of the OBC relative to the bracket to expose the light bar enough to pull it out with pliers:
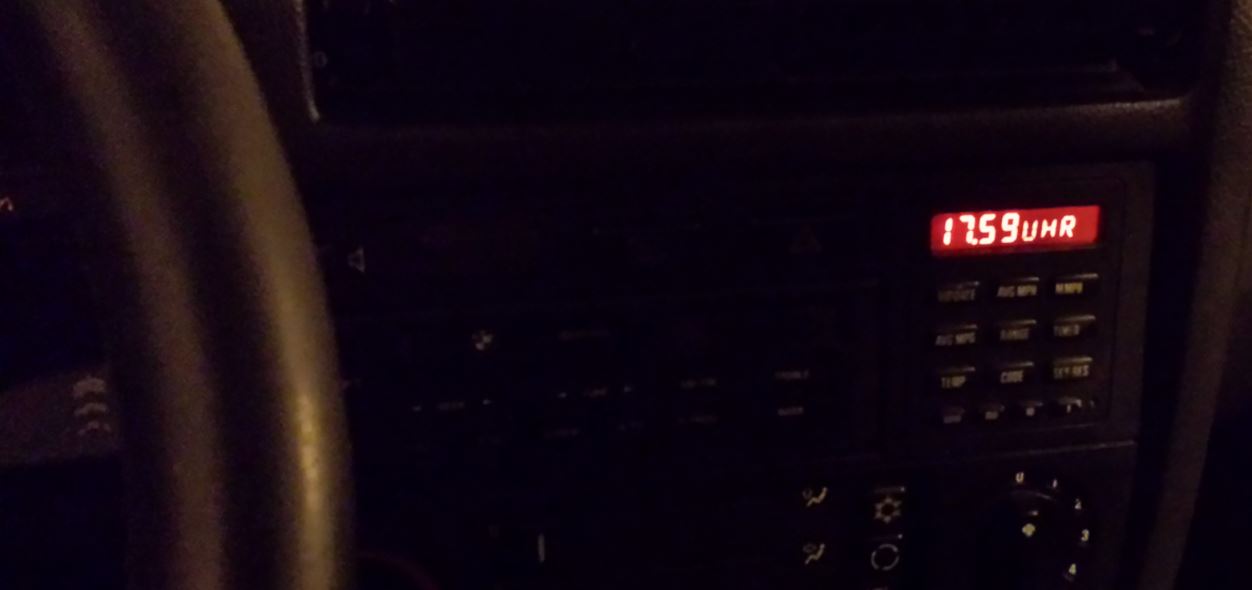
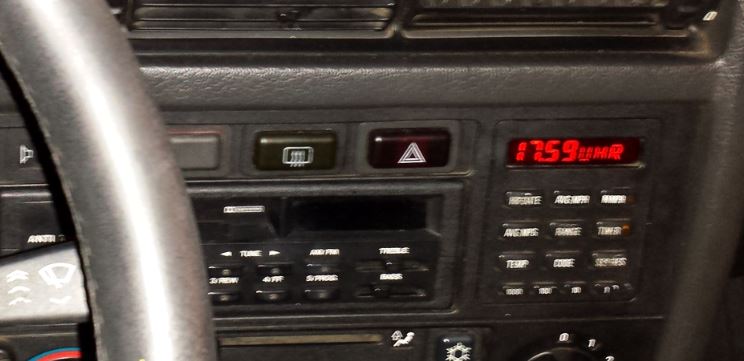
DONE! Finished result with LED light bar:

Hi
Awsome tutorial.
Quick question.
Have you bridged the solder under the board?