
A rear wheel bearing job, dependent on which tools you have can either be a fairly painless job, or rather difficult.
What you will need to make it easy is:
Basic range of wrenches
Plenty of 3/8 extensions
Socket set with ratchets
Hex Key Bit Socket Set or Torx key bit socket set (depending on bolt style holding your CV axle to Diff)
Breaker bar
2 or 3 Jaw puller
Medium strength loctite
Large circlip pliers
Torque wrench
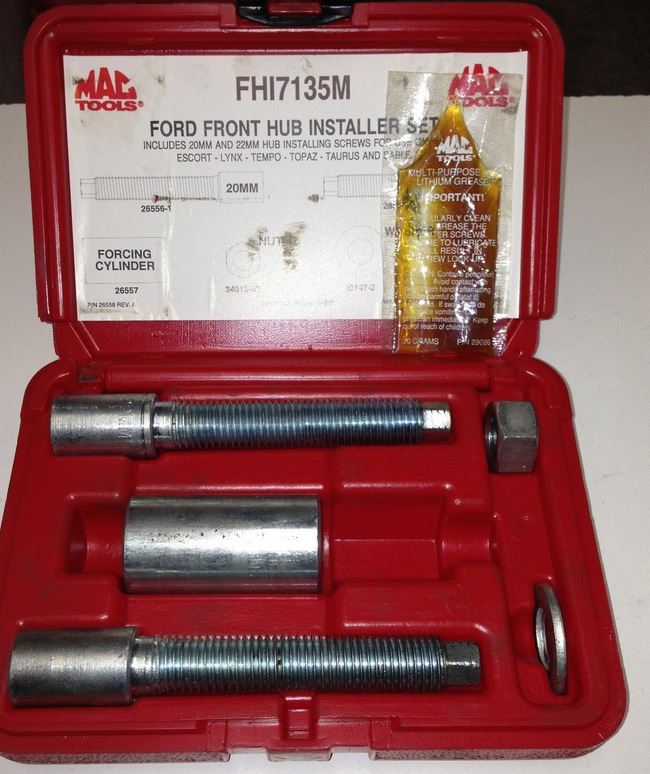
M22x1.5 “ford” Front hub installer which you can read about below:
Re-installing rear axles into hub the right way with the proper tool (E30, BMW, Porsche, etc.)
Expensive options:
SIR B90
Less expensive option:
Front wheel bearing bearing kit from harbor freight, or loan for free from parts store
Slide hammer with hub attachment, or loan for free from a parts store
Step 1: Lift and secure your E30, and remember to use jackstands.
Step 2: Remove the rear wheel in the corner that you plan to work on.
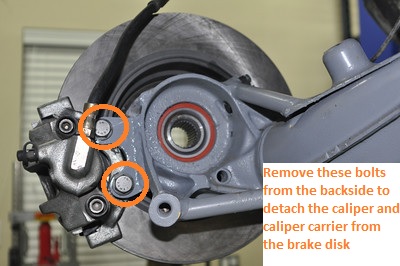
Step 3: Remove the two bolts holding the brake caliper carrier, and move the caliper and carrier assembly out of the way (use zip ties or bungee to keep it from pulling on the break line as it hangs).
step 4: Engage the E-brake to prevent the rear from spinning and undo the 6 Hex or torx bolts holding the CV axle to the diff. To get access to these bolts use 3/8 or 1/2 extensions on a ratchet and each time you remove the two accessible bolts, undo the E-brake and turn your CV axle, and re-engage the e-brake, rinse and repeat until all 6 bolts have been removed.

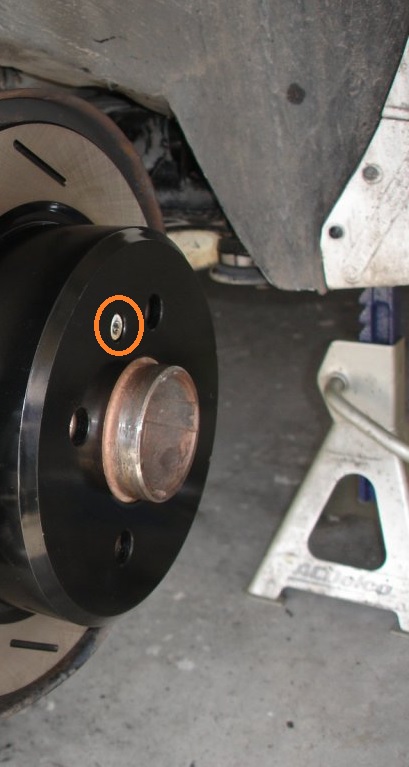
Step 5: Ensure e-brake lever is NOT engaged; otherwise when you try to slide the disk off, the e-brake shoes will prevent you from doing so. Remove brake disk by removing the brake disk set screw. Its normal for the disk to be a bit tight from oxidation around the hub, if it wont come off easily after removing the set screw, just give the disk a couple taps with a rubber mallet.
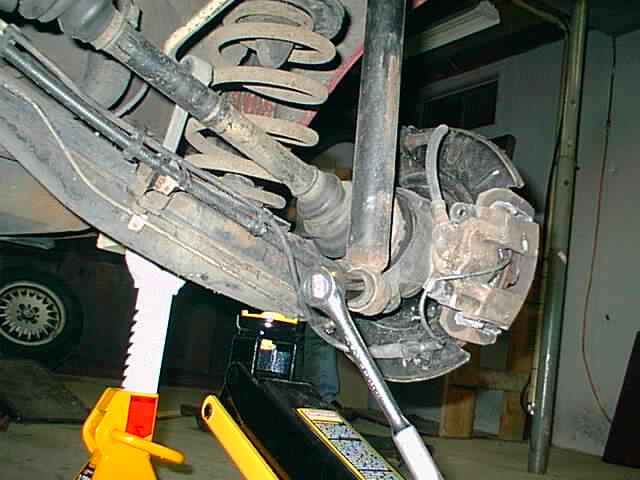
Step 6: Support (do not lift) the underside of the trailing arm with a jack and undo the rear shock mount bolt:
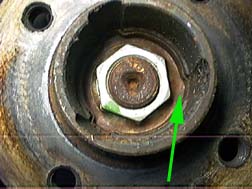
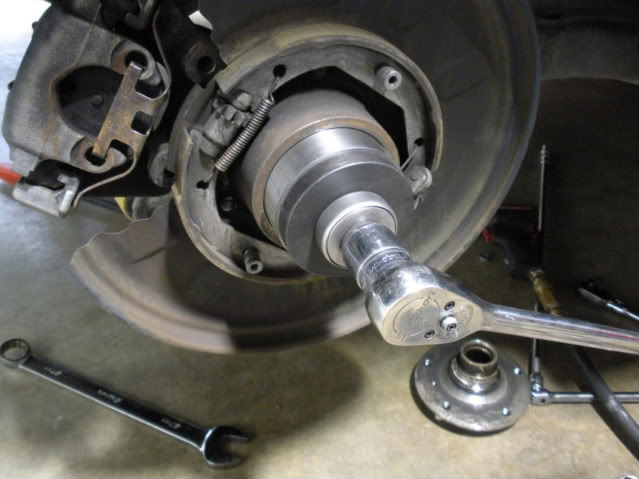
Step 7: Undo the CV axle nut. Make note that the nut is secured in place with a locking plate (indicated in green). With a strong impact wrench, the socket normally has enough bite on the nut to remove the nut with the locking plate as one unit. If you are removing without an impact wrench, bend in the outer rim of the locking plate with a screw driver or similar and remove using needle nose pliers.
Step 8: Place a 2 or 3 jaw puller around the hub, and the jaw pullers bolt which has a point in the small indent of the axle shaft. Proceed to tighten the jaw puller bolt until the CV axle gets pushed out of the back.

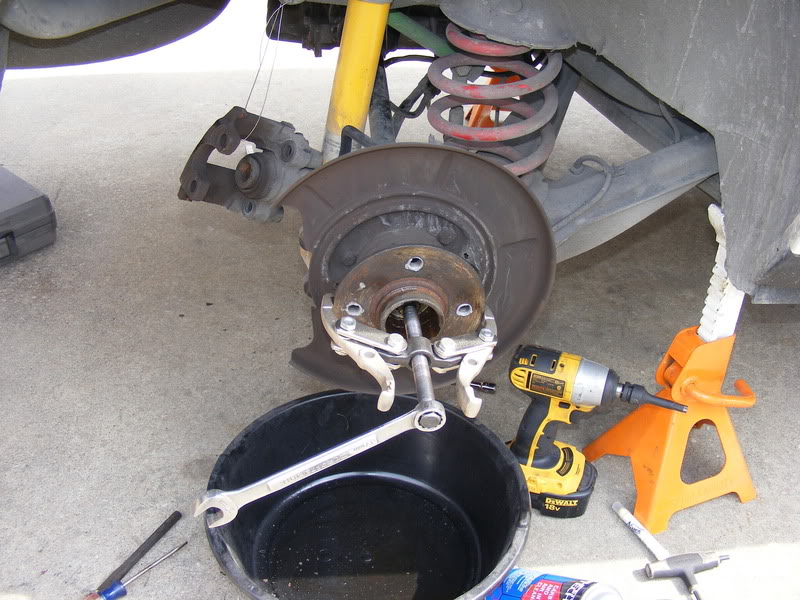
Step 9: If you are going the “less expensive” route, then attach your slide hammer to the hub and use the slide hammer until the rear hub comes off.

Use this method for extra leverage if the hub is being stubborn:
If using the more expensive route (SIR B90 hub remover), REMOVE THE E-BRAKE SHOES BEFORE USING, otherwise you will bend the e-brake mechanism. Follow the directions supplied with the B90 to remove the hub.
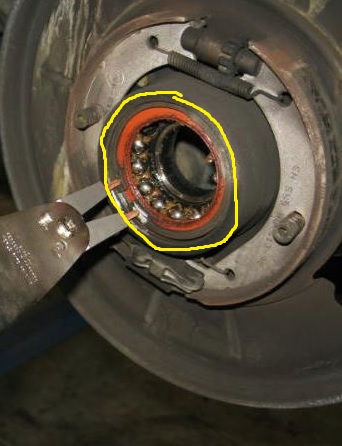
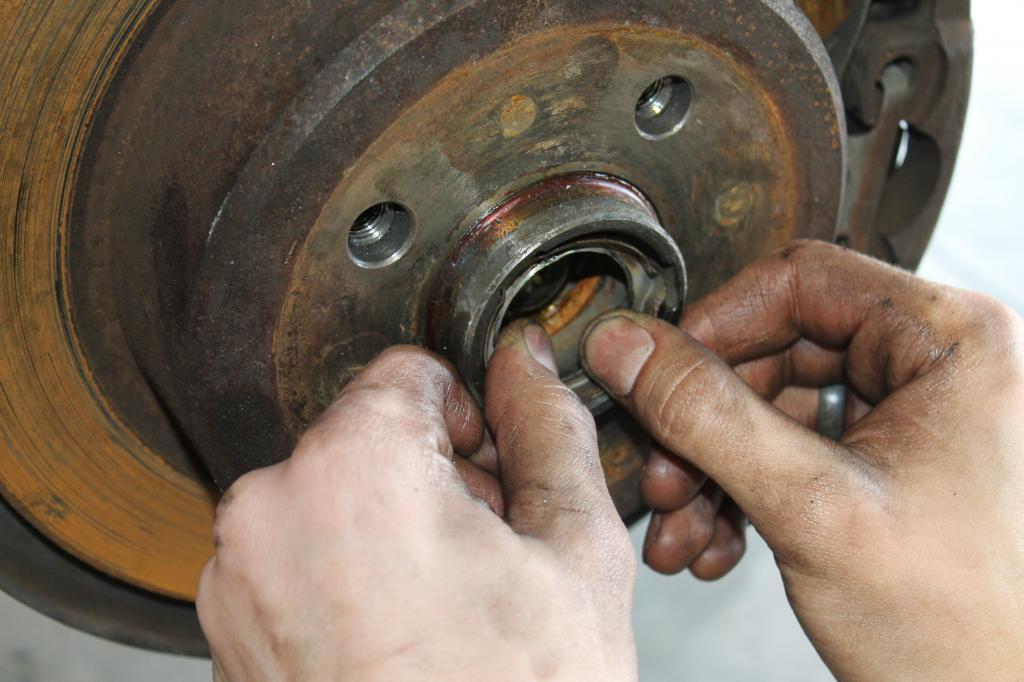
Step 10: Remove the rear wheel bearing circlip

Step 11: Assemble the SIR B90 or “Front wheel drive wheel bearing kit”.
On the backside find the adapter that fits inside of the green line as to be able to push the bearing.
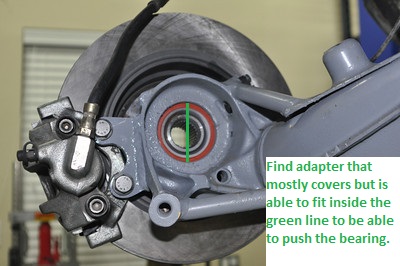
The front side will have a sleeve adapter that will allow for enough space for the bearing to be pushed into it. It will rest on the bearing tunnel; indicated in yellow.
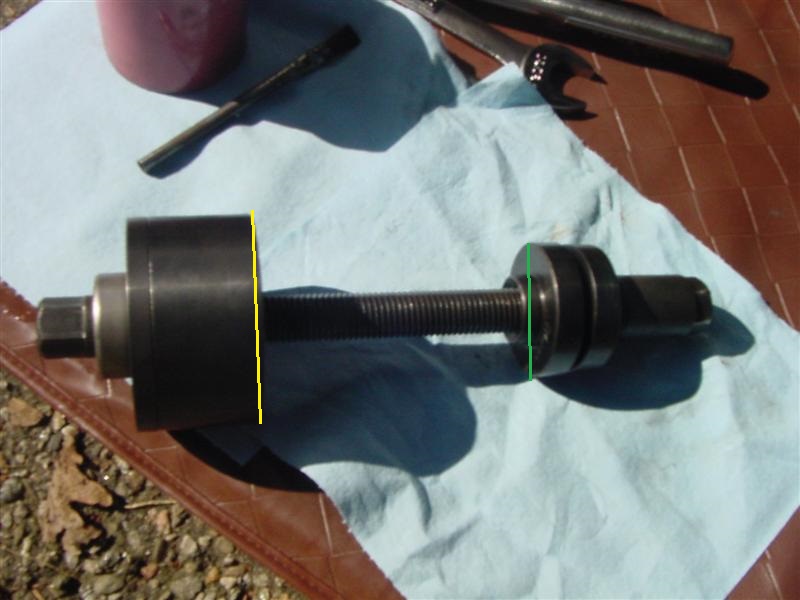
This is similar to what it will look like all together. As you tighten the bolt, the back adapter will push the bearing towards the outside of the car into the sleeve.

Step 12: Install the new bearing.
Replace the back adapter with one that fills the space indicated in purple.

For the front, change out the sleeve, for an adapter the same size as the outer diameter of the wheel bearing. The diameter indicated in brown.
Tighten until you feel it bottom out.
Step 13: Reinstall the circlip (picture is only for illustration, same picture as step 10 to show where it goes).
Step 14: Reinstall the hub by changing out the front adapter for one larger than the outer tunnel face of the hub.
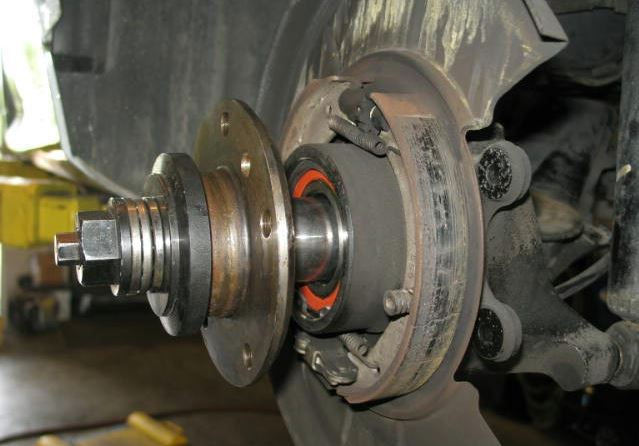
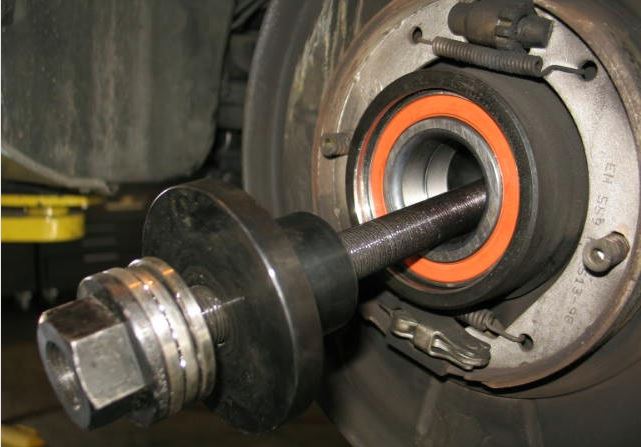
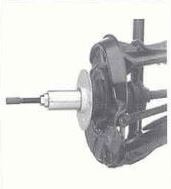
Step 15: Reinstall the CV axle by inserting the axle splines into the hub by hand. Then take your M22 x 1.5 axle installer and screw it onto the end of the axle threads through the inside of the hub. Put the forcing cylinder on, then the nut. As you tighten the nut, the installer will pull the axle into the hub.
I can not stress enough how important this inexpensive tool is! With it, installing the axle is a 2 min job, without it, you will be struggling for a while, and likely will damage something in the process!
Step 16: Reinstall axle nut and torque to spec (184 ft-lbs [250Nm]). Then install a new locking plate by tapping it into place with a screw driver around the nut.
Step 17: Reinstall the CV axle to the diff using the 6 bolts you removed prior.
Use medium strength loctite, or you severely risk these bolts vibrating loose.

Step 18: Reinstall the brake disk and set screw, and proceed to reattach the brake caliper carrier.
Step 19: Reattach the rear shock bolt. Depending on how much it has moved you may need to use a jack to lift the trailing arm to align the shock bolt hole with the trailing arm hole.

Recent Comments