
Recharging your own Air conditioning system is one of those things that seems difficult, but really is rather simple as long as you have all the correct tools and follow the correct steps.
I will as in depth as I can describe how to properly pull a vacuum on your car, how to check it for leaks, how to refill the system and which refrigerant to use.
But first, lets get some misconceptions/misinformation out of the way that you will find else where.
First: R-12 is illegal now in most countries; once it was discovered that CFC’s (like R-12) caused damage to the ozone it was outlawed. R-12 still exists and can be bought second hand by anyone with the proper certifications. However, because new R-12 can not be manufactured, it is both hard to find and has substantially increased in price.
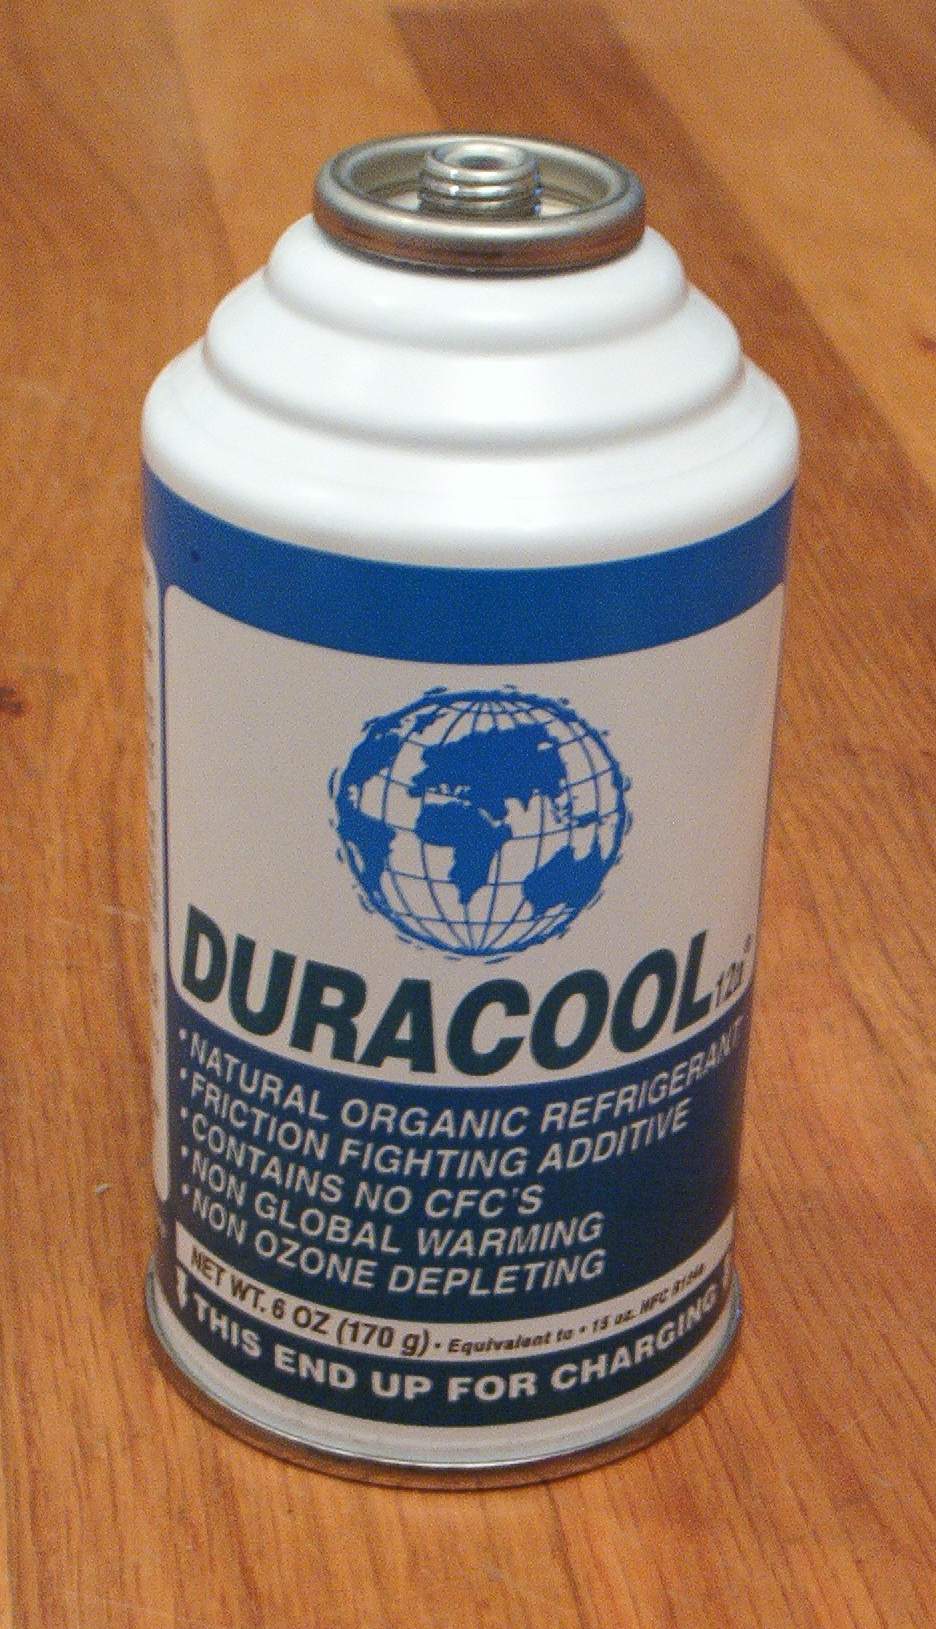
If you have a R12 refrigerant system like the one found on the E30, your best course of action is NOT to convert to R134a. Rather it is best to use a hydrocarbon based refrigerant which is a direct replacement in R12 systems.
These hydrocarbon based refrigerants are sold under the Duracool 12a, Red Tek R12a, Freeze 12 or similar brands.
R134a is far less efficient than R12, and has a much smaller molecule size. Because of the former, to successfully achieve R12 temperature levels you need to change major AC components. Because after the latter, even if you do change major components, you still need to change all o-rings in the system, otherwise the R134a will leak out.
Switching R12 to R134a is a terrible industry practice that rakes in big money for retrofit shops.
R12A which is the legal hydrocarbon replacement for R12 actually has a significantly larger molecule size than R12 or R134a, and therefore not only cools better, but significantly decreases leaks in the system. In a native R12 system, no o-rings need to be changed.

You will read in some places that R12a is flammable, and it is as all hydrocarbons are, however the below sums up that it is a none-issue for an AC application:
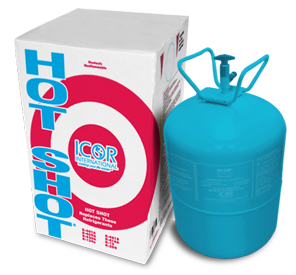
Second: You will also hear of R-414B also known as “Hotshot” as an acceptable replacement for R12. R-414b is a blend of R-22/R-124/R-600a/R-142b (50%±2%/39%±2%/1.5%±.5%/9.5%+.5,–1%). With the major component being 50% R-22. Even though it is advertised as a direct replacement for R-12 (and R-134a, R-401A, R-401B, R-409A, R-416A, R-420A, and R-500) it is not.
R-22 is incompatible with R-12 automotive compressors and will slowly destroy the seals inside of the R-12 compressor.
It also has a molecule size similar to that of R-134a, and will similarly leak.
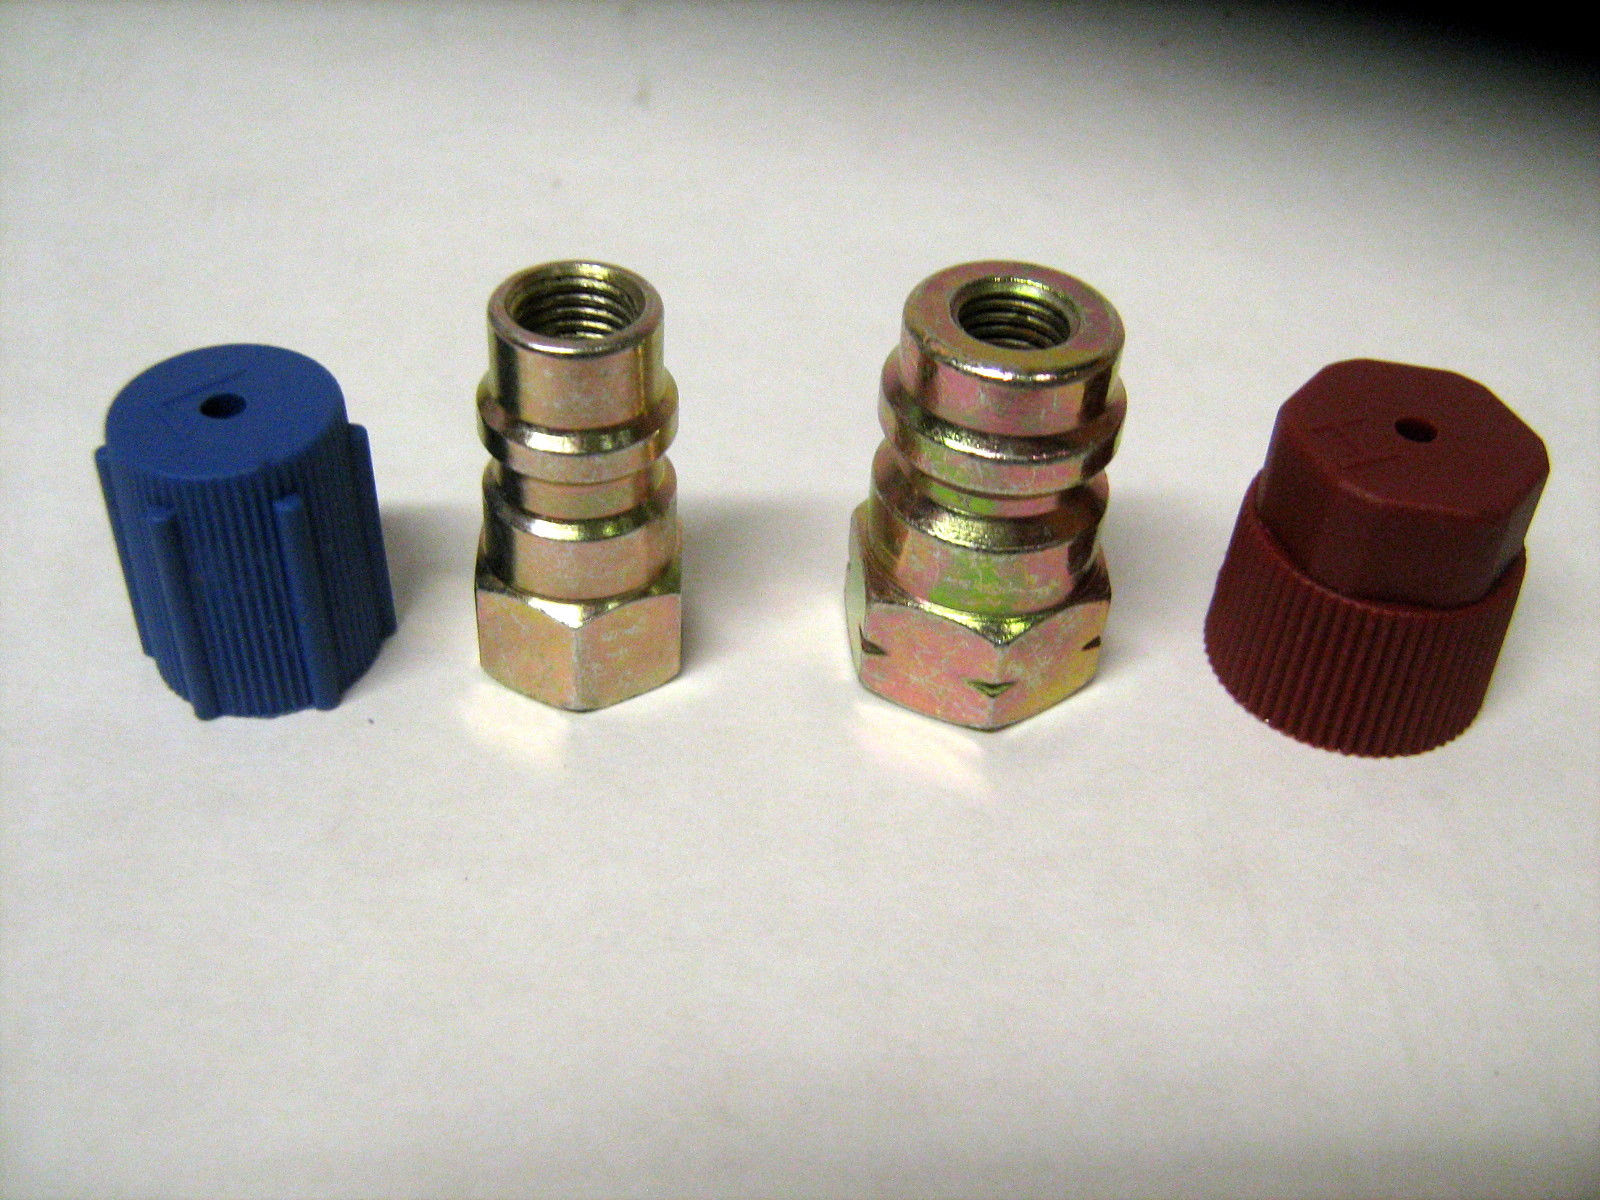
Third: A “retro-fit” kit is not needed for an R-12 system to recharge the system with any kind of refrigerant, in fact the OEM shrader valve caps (valves used to recharge AC system) have rubber seals on them which seal far better than any retrofit kit I have ever seen.
The below adapters are unnecessary if your ac manifold kit is able to connect to R-12; and most are able to connect to R-12, as the R-134a style connectors (which connect to the below adapters) are adapted to the R-12 connector on the AC manifold. So cut out the middle-man and just connect the R-12 connectors from the ac manifolds to the r-12 connectors on your car!
Fourth: All AC systems leak. It may take decades, but most AC systems leak and at one point or another will need to be topped up or recharged.
Before we start, let me be clear that in most jurisdictions it is illegal to discharge ac systems into open air. This does not apply to you if you are just topping up, but if you are doing a full recharge, please have your car professionally evacuated by a shop with the appropriate equipment. Evacuating your system professionally shouldn’t cost very much; the shop hooks up a machine, it pull the old refrigerant out so you are left with an empty system.
Wear glasses and gloves, refrigerant is very cold and you don’t want to get frost bite on your hands or eyes.
The tools:
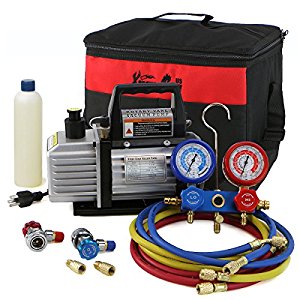
You can get a kit like the below for about $100-120 from ebay/amazon that will have almost everything you need to recharge your system minus a couple parts I will note below.
The kit contains:
Ac manifolds and associated R-12 hoses
R-134a connector adapters
Vacuum pump
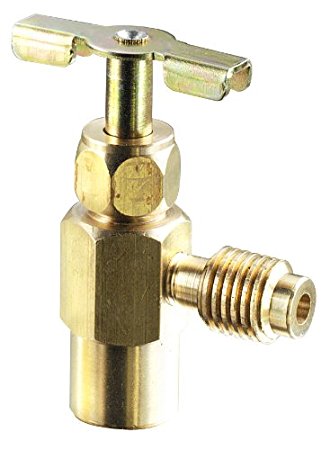
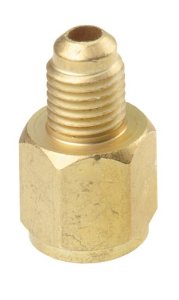
To connect the ac manifold gauges to a recharge can, you will also need a AC can tap and associated adapter to adapt the can tap to the ac manifold hose (yellow hose).
FJC 6030:
FJC 6015:
To recharge the system:
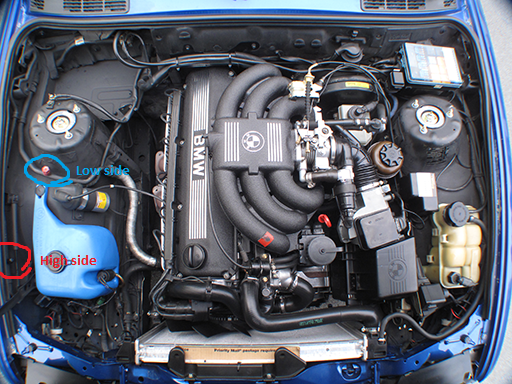
Step 1: Connect the ac manifold hoses to your car, in this example we will use an E30:
Connect the Blue hose to the low-side shrader valve and the red hose to the high-side shrader valve.
Hand tighten the hoses, no need to use tools.
Step 2: Connect the yellow hose to your vacuum pump.
In the pump below the hose connects from the side, some pumps connect at the same spot but from the top.
Hand tighten this hose, do not use tools.

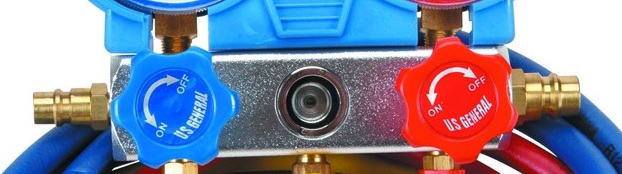
Step 3:
Turn both the high and low knobs to the open position (counter clockwise):
Step 4: Turn on the vacuum pump and watch the pressure go down on the gauge inHg (inches of mercury):
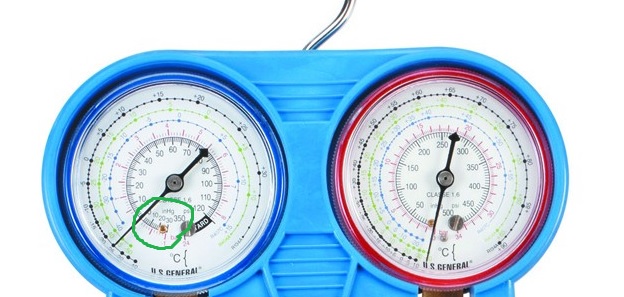
Step 5: confirm on the label found on your vacuum, how much vacuum it is able to pull. Lower cost vacuum pumps will not pull a high vacuum (15-20 inHg).
The reason we are pulling a vacuum is two fold:
First to remove any air and air born contaminants.
Second to lower the boiling point of any moisture inside the ac system. Moisture is very damaging in AC systems.
As per the below chart you will see the more vacuum we pull the lower the boiling temperature gets.
Generally speaking at sea level an absolute vacuum is -30 inches of mercury. At which point any water would boil instantly.
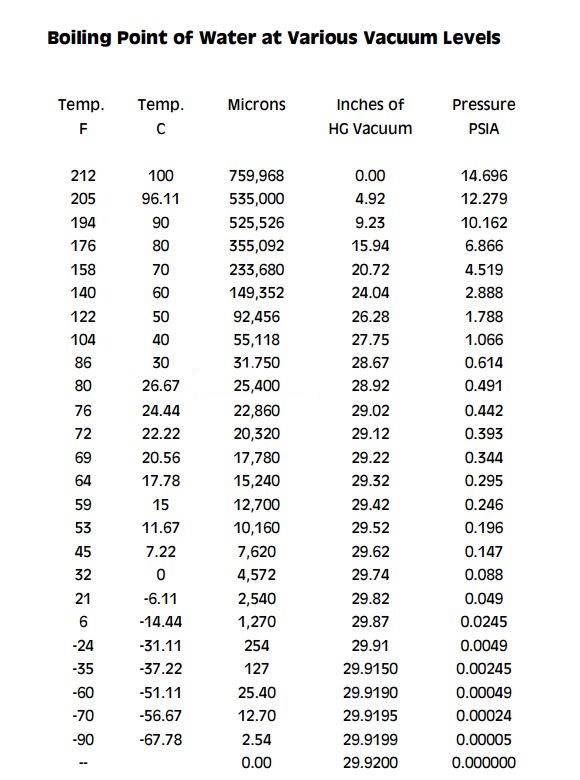
With the moisture boiling, the vacuum will be sucking it all out.
Remember, I said sea level. However as per the below chart an absolute vacuum changes relative to your elevation.
In the below level, you will find that at a 5000ft (1524m) elevation an absolute vacuum is not -30 inHg, rather closer to 25 inHg.
Use the chart accordingly to your elevation. To find your elevation you can search in google, “*mycity* elevation”.

Step 6: After 15min, with the vacuum pump still on, close both low and high pressure knobs on your AC manifold. Then turn off the vacuum.
This will lock in the vacuum in your system.
Make note, of what the inHg measurement is showing on the gauge.
Come back in 2 hours and confirm that the needle has not moved.
If the needle has moved, that means you have lost vacuum and thus have a leak in your AC system.
Resolve any of the leaks and repeat the above steps until your system is holding consistent vacuum.
Step 7: Turn the vacuum back on, and reopen both low and high side taps on the AC manifold. Pull vacuum for another 2 hours to make sure everything is vacuumed out.
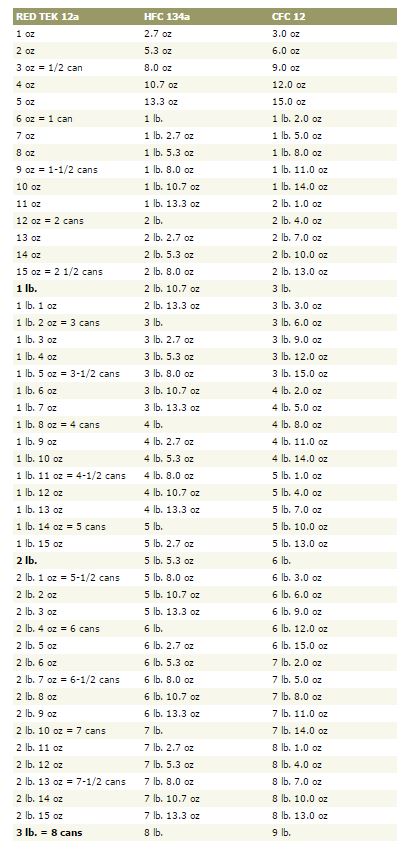
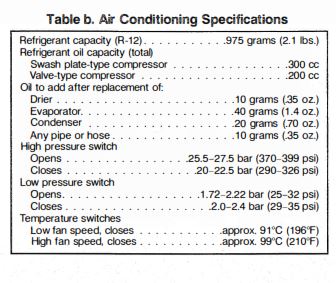
Step 8: Confirm how much refrigerant you need to add to your system, every refrigerant type has a different density and properties.
The can will note the equivalences. For Red Tek R12a for example, 1 can of 6oz refrigerant is equal to 1lb 2oz of traditional R12.
Most cars have stickers similar to the below somewhere in the engine bay noting how much of a specific type of refrigerant is needed for that vehicle.
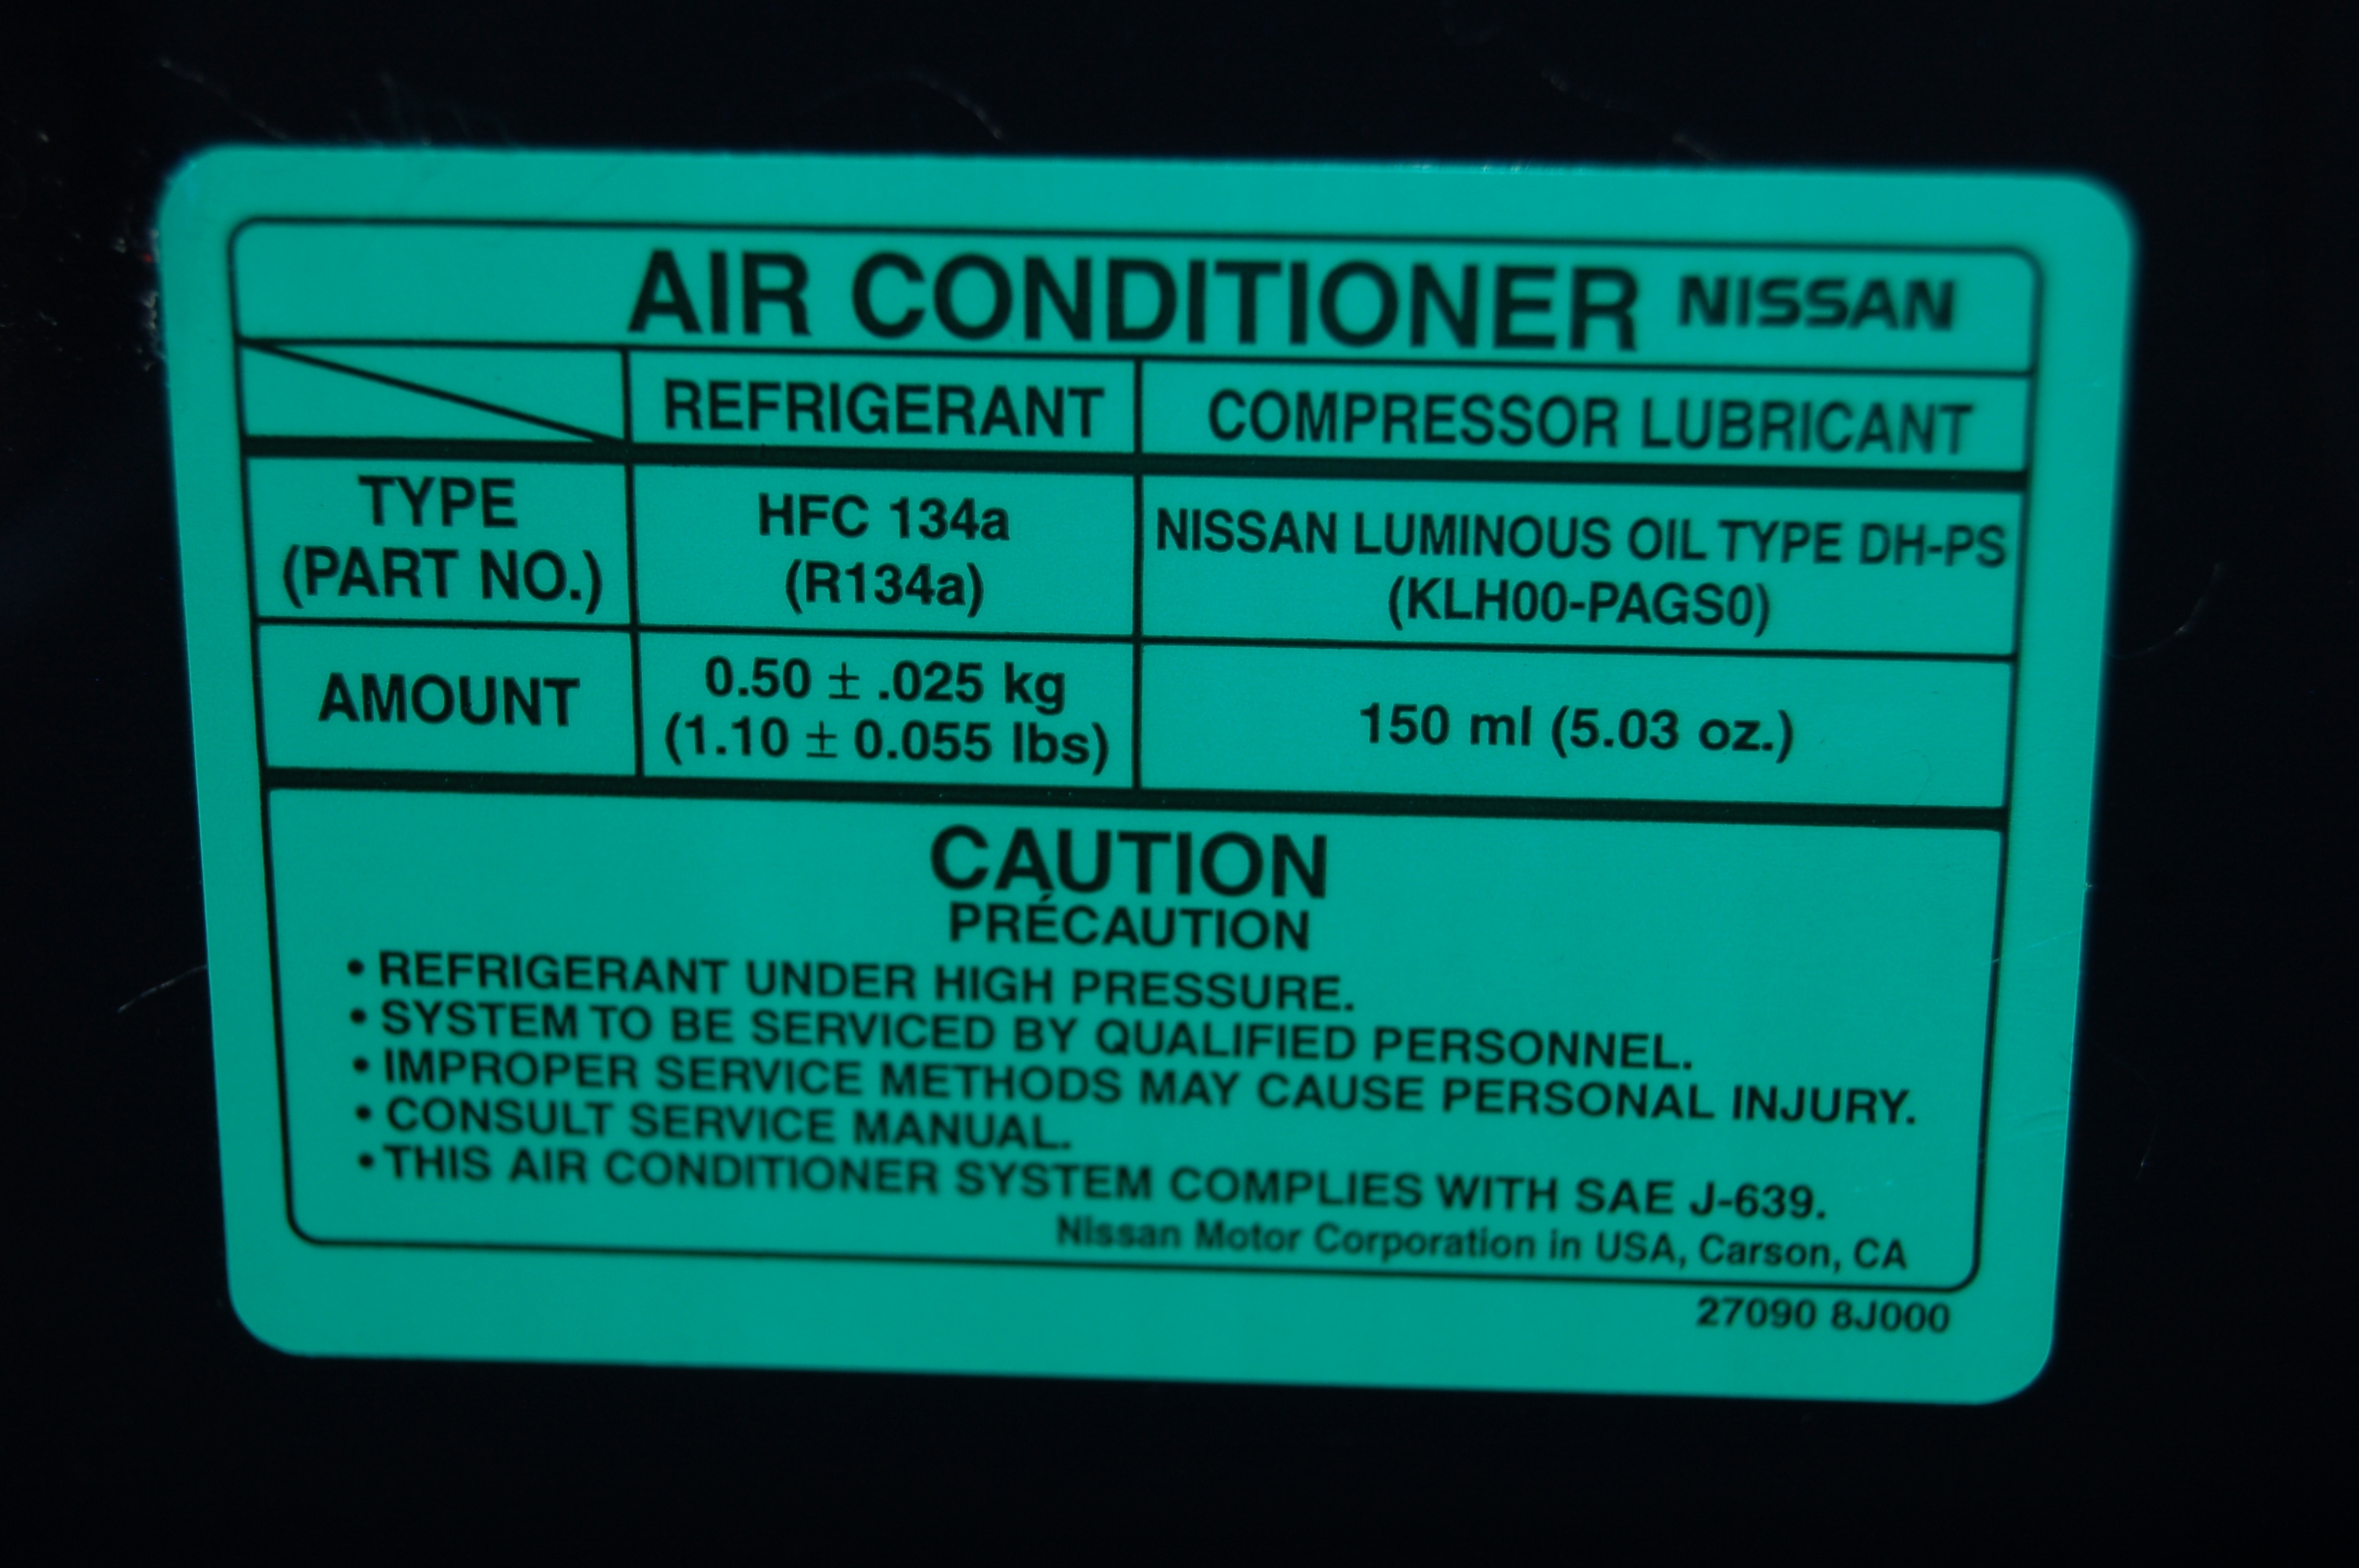
For an E30 when filling with R12a we need between 11-12 oz or 2 cans of 6oz:
For a vehicle that needs an amount that requires a portion of a can, you can use a kitchen scale to measure the weight of the can as it fills. When the vehicle has reached its needed amount you can close off the AC manifold taps.
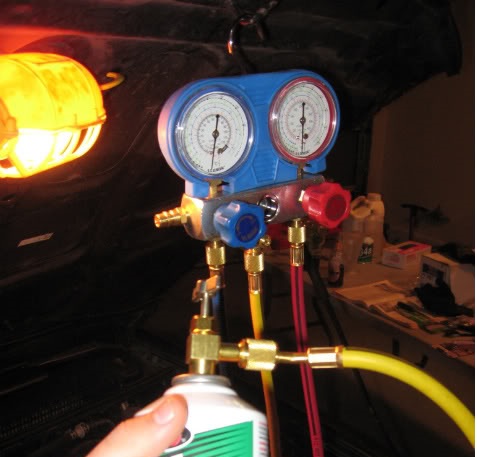
Step 9: Close low and high side taps again (holding vacuum), turn off vacuum, detach yellow hose from vacuum and connect your can and tap to the yellow hose:
While assembling ensure the can tap handle is unscrewed all the way as to retract the pin that will puncture the can.
Step 10: Puncture the can by screwing in the handle on the can tap all the way, then backing off 1 turn (to allow space for the refrigerant to flow).
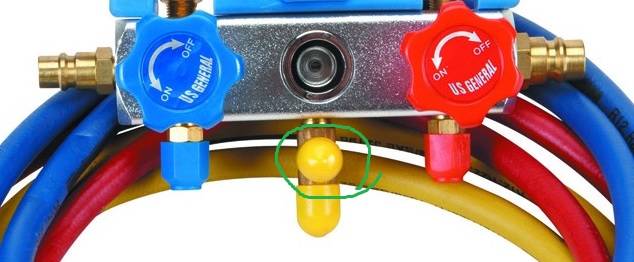
Step 11: There is a shrader valve located here on the manifold. Press the shrader value pin briefly with a screw driver to purge any air out of the line. Wear gloves, refrigerant is very cold.
Step 12: Open the low side knob only (blue knob) on the ac manifold and turn the ac can upside down.
Wait 10 min for the refrigerant to flow in. Periodically shake the can to assist the flow.
Step 13: The ac compressor will not switch on without pressure in the system, and this initial can charge will be enough now for the compressor to activate.
Turn the car on, select the AC to be on, and set the ac fan speed to high.
Once the compressor has kicked on you will notice the low side pressure start to drop and the high side start to build.
Step 14: Wait for 5 more min and continue to periodically shake the can.
Once you feel the can is empty. Close the low side ac manifold knob, unscrew the can tap handle and detach the can and connect another to the can tap.
Puncture the new can, and repeat step 11 to purge the yellow line and reopen the low side ac manifold knob.
Step 15: Wait another 15 min while periodically shaking the second can (keep can upside down).
Once the can is empty close the low side AC manifold knob (and confirm that the high side red knob is still closed).
Confirm low side pressure is in the ~30psi range and high side is in the ~300 psi range with the car and compressor running (refer to ac specs in step 8).
Step 16: Turn off the car and disconnect all ac manifold lines.
Step 17: You are done, put back on the low and high side shrader valve covers.

What pressure switch is needed for the r12a? I would imagine it has to be different than the one for r134a, since they operate at vastly different pressures.
Hydrocarbon refrigerants like R12a have lower vapor pressure, so the low-side pressure remains similar, but the high-side pressure is significantly lower compared to R134a or R12.
Because of this, safety switches designed for R12 or R134a systems will still function properly with R12a. A switch replacement usually isn’t necessary.