
I remember when I had my first E30 and the gasket was leaking. Funny how then i couldn’t find any DIY that didnt envolve lifting the engine (off the motor mounts) or dropping the subframe… and now i have found two with the “easy route”! Both are basically saying the same thing just from different people. Found this on http://www.e30performance.info/viewtopic.php?f=21&t=228 and the second on http://content.hooddumpe30.com/diy/engine-write-ups/replacing-m20-oil-pan/
Enjoy!
I have been asked and come across many people that want to know the easiest way of getting an oil pan off of the M20 engine. It is a relatively easy process but can be time consuming if you haven’t done it before. The bolts are in tight spaces that are generally not easy to get to. This tutorial will show you how to do the oil pan without taking off the motor mounts, sub-frame, steering rack!
Tools Needed:
Set of inverted torx bits.
10mm open ended box wrench
13mm open ended box wrench
10mm socket
13mm socket (I’m assuming you have a ratchet wrench)
17mm socket
Short extension
Jack + stands
Optional Tools:
U-joint
Long extension
Brake cleaner/PB Blaster
17mm open ended box wrench (you might need this)
“While you’re down there” optional tasks:
Oil change
Check the crank/assembly for broken parts/problems
Paint the transmission shield and oil pan
Step 1 – Prep:
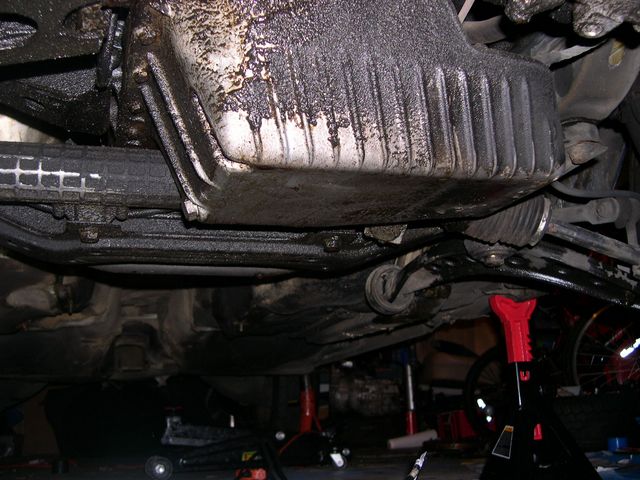
Gather all of your tools and drain the oil from the car (17mm for the oil drain bolt). Its suggested you have a fresh crush washer. Jack up the car. I suggest putting the car on 4 stands just so everything is level. Here is what you should see.
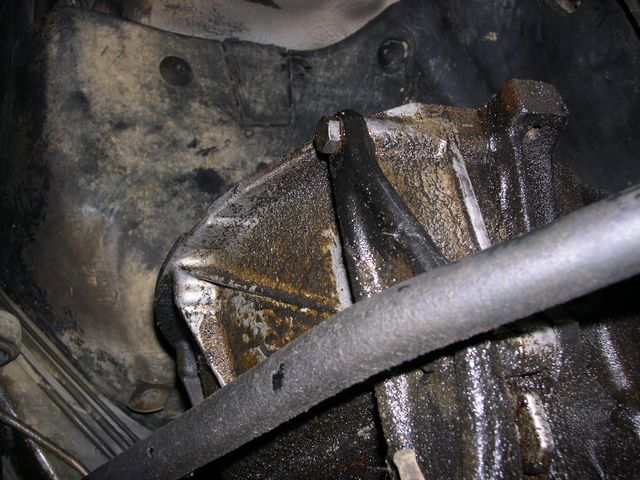
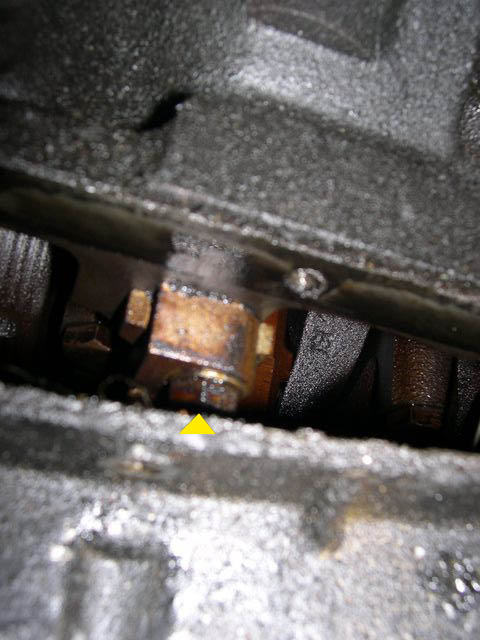
Step 2 – Transmission shield:
On the back of the oil pan there is a cover that prevents debris from entering into the transmission bell housing. It takes 4 13mm hex bolts (see picture below) and 4 inverted torx bits from behind. If you have never seen interted torx bits before; they are a 6 sided socket used to gain more grip for extra torquing. As you can see the transmission in my car is gone so I can’t tell you which socket size youll need. Just make sure you use one that fits perfectly or you run the risk of rounding them out.
Step 3 – Oil pan bolts:
Here is the “fun” part. There is a series of 10mm bolts all the way around the perimeter of the oil pan. I estimate about 20 in total. The ones that will give you the most trouble are the 4 directly above the sub frame and steering rack. You will need to use the 10mm open ended box wrench or a combination of extensions and U-joints. If you have them all, the oil pan should be able to be wiggled around.
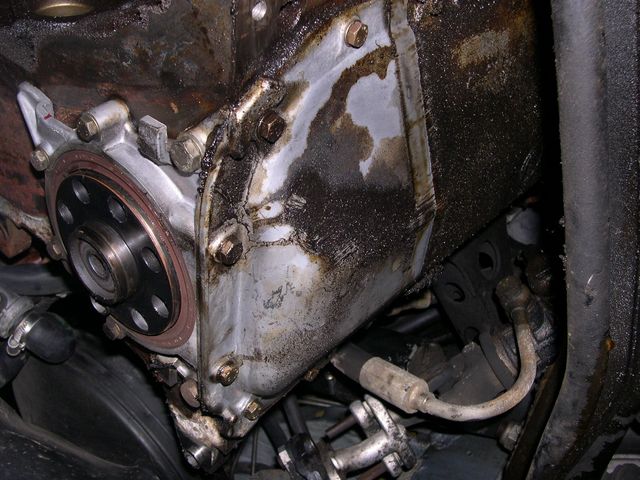
Step 4 – Oil pump bolts:
This step is fairly simple but it is what will keep you from dropping the sub frame or steering rack. There are three 13mm bolts that keep the pump in. Two on the passenger’s side and one on the driver’s. Use the 13mm open ended box wrench to get them out. Wiggle the oil pump until it falls into the oil pan.
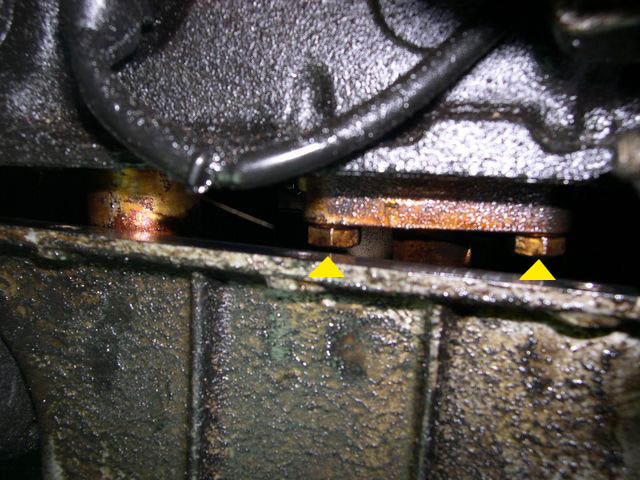
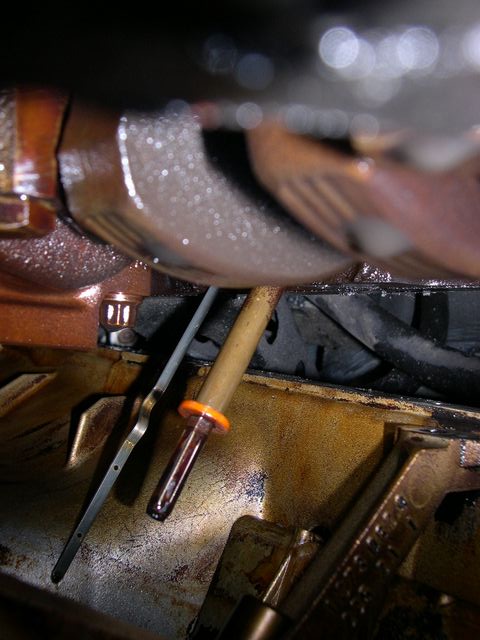
Step 5 – Last removals
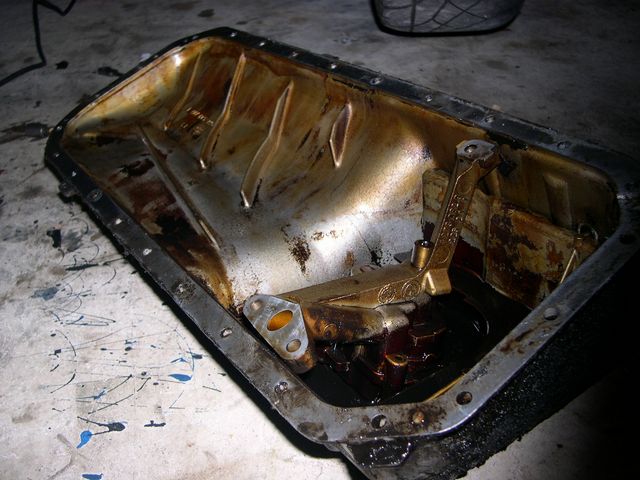
I always forget to take something out! You need to take the oil dip stick out. You also need to drop the oil pump drive shaft if it hasn’t already dropped (the orange thing in the picture next to the dip stick.
On top of that, the oil level sensor needs to come out (two 10mm nuts)(not pictured). Also remember to remove the ground strap with a single 13mm nut. It isnt pictured but it is right behind the oil level sensor and attaches the oil pan to the chassis.
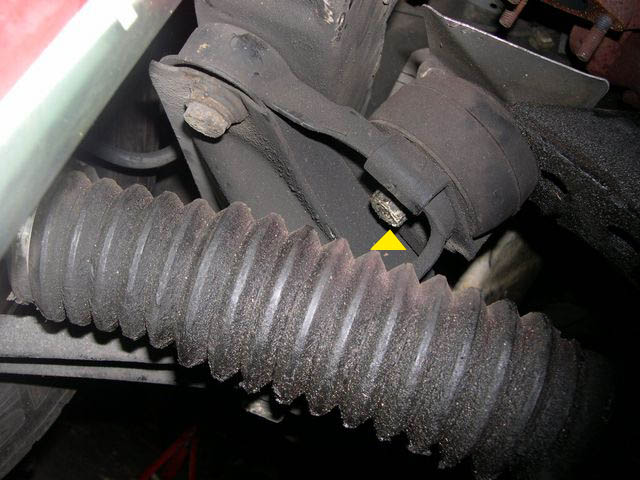
Step 6 – Loosen motor mounts:
Don’t worry, we aren’t taking them out. All four motor mount nuts need to be loosened until there is barely full threading on them. We need to keep enough threading on them so the mounts don’t come out and we have to re-seat them. This way, we can jack up and down the engine without having to worry about it’s alignment.
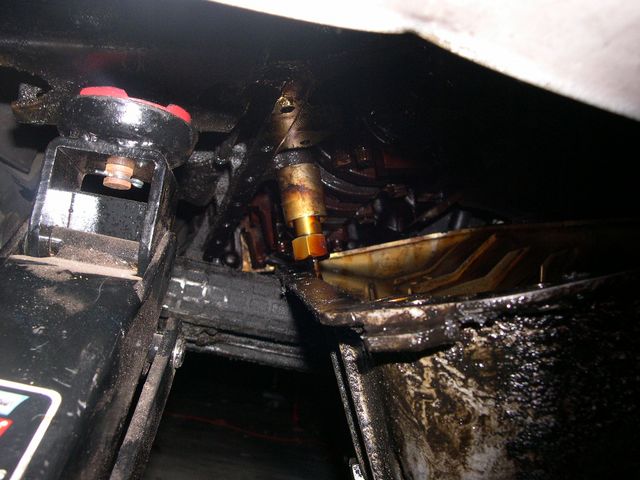
Step 7 – Remove the oil pan:
Place your jack under your AC or AC bracket if you have removed your AC. Now jack up the engine until you can pull out the oil pan. There is an unremovable oil pressure thing (I have no idea what it is) that will get in the way. You can press it in a little to gain more clearance. For this particular instance I had to jack the engine so far that the intake touched the fire wall. If done right, it shouldnt stress the motor mounts too much and there will be no damage to anything.
Step 8 – Re-installation:
Installation is obviously the reverse of removal. It is a bit harder though. Keep the oil pump in the oil pan and place the drive shaft for it in place. It will take some shimmying but it is very doable. Remember! If you forget this, your oil pump will NOT work and you will get 0 oil pressure!
(Sorry for the fuzziness)

Round 2
written by Josh Anderson
On the same day I gave my wife’s 325i a thorough check-over before buying it, the guy I bought it from hit a rock on his way home and tore a 2” x 3” hole in the oil pan. Needless to say, he knocked $400 off the price of the car for parts and labor to get it fixed. So instead of paying $45 to have it towed to the mechanic, $280 for a brand-new oil pan, and about $250 for labor (for a grand total of about $590), I decided to spend about $100 and a day off, get a couple of my friends together, and fix it myself. This job will take about 1-3 hours, depending on your mechanical knowledge.
Tools needed:
• Yourself, and 1-2 mechanically competent friends
• New oil pan
• New oil pan gasket
• New drain plug (optional)
• New oil filter
• 5 quarts of your favorite oil
• Power drill w/ socket attachment bit
• Sharp putty knife or gasket scraper
• Several assorted size metric ratchets, sockets and torx sockets
• Several assorted size metric wrenches
• Ratchet swivel/u-joint
• Assortment of short and long ratchet extensions
• Engine lift
• Floor jack
• 2 jack stands
• 1 case of beer (optional – age permitting – for afterwards)
• An extensive vocabulary of colorful expletives
Drain ALL the oil out of your engine (unless a hole in your oil pan already did it for you). Remove the oil level sender and the ground strap from the front-top of the oil pan. It doesn’t hurt to disconnect your battery before doing this, either. Remove the hood. Remove the fan shroud from the radiator.
Jack up the car on the front subframe of the car as high as is safely possible, and position the jack stands under the frame on each side of the car behind the front wheels, then remove the floor jack. Disconnect the oil cooler lines (325i models only) from where they mount to the block, near the oil filter mount. Move toward the front of the car, and unbolt the motor mounts.
There is a flywheel cover over the back of the oil pan that covers the back 3-4 inches of it. This must be removed. There are 4 bolts holding it vertically, and 4 torx bolts holding it horizontally. These must all be removed to get the small cover off. Some of them are different lengths, so make sure you remember which ones go where. Once you have all the bolts out, it takes a little reefing to get it off, but just pull down gently on the 2 steel lines running along the transmission to get it out.
Position the engine hoist at the front of the car, and secure it to the hoist point located at the front of the cylinder head. Lift the engine SLOWLY up, as high as you can safely lift the motor. This should give you more than enough room to remove the pan and clear the oil pump without having to remove it.
There are 25 (that’s right, TWENTY-FIVE) 10mm bolts that hold the oil pan to the block. THIS is when the power drill comes in handy, or you will be under there all day. You will be able to get most of them out with the drill, but a few of them are in tight spots, so use your ratchet and extensions to get them out.
After removing the oil pan, set it aside, get on your back under the engine, get your gasket-scraping implement, and remove all the remaining gasket that is still stuck to the block. Trust me, there will be a lot, and you’ll probably end up eating about half of it. Be careful not to gouge the surface of the aluminum while scraping.
Position the new gasket on the oil pan, making sure that it is on correctly. The shape of the gasket surface is not symmetrical, so be sure than it is on in the right orientation. To make bolting the oil pan and gasket up to the block a little easier, you can dab a tiny amount of gasket sealant every few inches or so under the gasket to make it stick to the pan. This saves you a lot of alignment headaches.
Replace the 25 oil pan bolts, and make sure they are snug. You don’t want them super-tight, just nice and snug. Replace the oil lever sender and grounding strap. Don’t forget the grounding strap, or the car won’t start. Ask me how I know.
From here on out, putting everything back together is just the reverse of everything you have done up to this point. As always, be sure to check the car thoroughly for tools, and that you have EVERYTHING bolted back up nice and tight.
Good luck, and be careful. You will be under the car for most of this job.

what were the years for these cars? mines a 1990 325i, and I have to do the same thing. just want to make sure this tutorial will match up and I don’t find any surprises when I get under there.
All M20B25 engines will be the same (the engine that is in your 325i) regardless of year in relation to the oil pan and oil pan gasket.
Doing this right now. Your information and pictures helped me a lot. I ended up loosening the lower and my upper sway bars so that I could get off the bracket on the bottom, and the lift the engine and not hit that sway bar.
I loosened the AC bolt and cranked it all the way up so that it was in the highest position (belt flops off) to where the bracket is almost horizontal. I thought that was best because it was angled when adjusted for tightness.
But then I was able to use a foot long 6×6 bungied to the floor jack to reach up and lift engine. Bungie held it upright ( a screw in each side of 6×6 gave me something to wrap bungy around)
I took out all but about 3 screws in the pan before I started jacking.
I was able to just work the cooling fan over the top of the fan shroud as I jacked the engine. It didn’t bend the blades too much.
Then I could remove remaining bolts in the oil pan. I didn’t have to loosed steering rack nuts at all!
Jacked it enough to wiggle out the pan. Hopefully put it all back in tomorrow!